
Wedding is an importance moment for every bride. So all brides cherish the great opportunity to make herself more stunning and charming. An many people are willing to spend time and effort to look for the suitable hairstyle for the romantic and sweet wedding.
Easy and Stunning Bridal Hairstyles Tutorial
1- Double Lace Braid High Bun Instructions
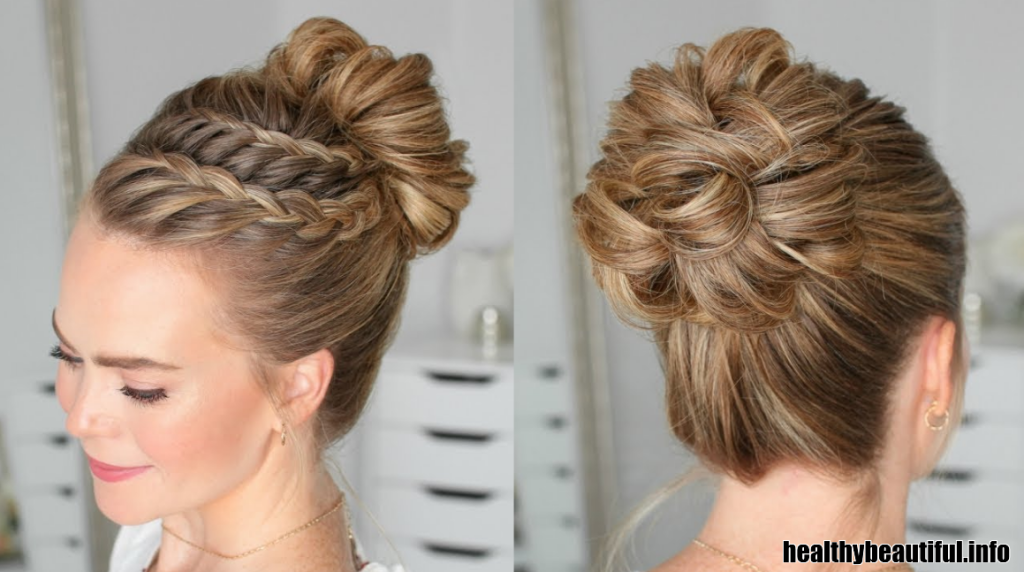
Picture this: You, on your big day, looking absolutely radiant with an elegant double lace braid high bun. It’s a hairstyle that exudes sophistication and romance. Here’s how to make it happen:
What You’ll Need:
- A hairbrush
- Hair ties
- Bobby pins
- Hairpins
- A hair donut (if you want extra volume)
- Texturizing spray (optional for a bit more grip)
Step 1: Prep Your Locks
You’ll want to start with clean, dry hair for this. If your hair is a little too smooth, give it a spritz of texturizing spray or dry shampoo to create a bit of texture – it helps with holding the braids.
Step 2: Form a High Ponytail
Gather all your lovely locks at the crown of your head and secure them with a hair tie. Make sure it’s snug but not too tight; you’ll need to work with the hair around it.
Step 3: Divide and Conquer
Split your high ponytail into two equal sections. It’s like the stage is set for the elegant braiding that’s about to happen.
Step 4: Embark on the Lace Braids
Let’s focus on the left section first. Divide it into three smaller sections to kick off a beautiful lace braid. It’s simple, really. Cross the leftmost strand over the center one, just like a regular braid. Then, the rightmost strand follows suit, crossing over the center.
But here’s where the magic happens: you’re going to add a small section of hair from the loose hair on the left to the leftmost strand before crossing it over the center. Repeat the process for the right side, crossing the rightmost strand, adding a snippet from the right side, and crossing it over the center.
Keep these lace braids snug but not too tight, so they look like delicate lacework. Braid each side separately until you reach the end of your high ponytail and secure them with small hair ties.
Step 5: Give It Some Volume
Now, let’s make these lace braids pop. Gently tug on the edges of each braid to “pancake” them. It creates a voluminous, textured look – so dreamy!
Step 6: Transform Your Braids into a Bun
Time for the grand finale! Take the left lace braid and wrap it around the base of your high ponytail. Secure it with bobby pins. Then, do the same with the right lace braid, but in the opposite direction. Tuck any loose ends under the bun and secure them neatly.
Step 7: The Finishing Touches
Use hairpins to make sure the bun is solid and to make any tiny adjustments. If you’ve got a hair donut or padding in there, make sure it’s hidden out of sight.
Step 8: Lock It in with Hairspray
Spritz your double lace braid high bun with hairspray to keep everything in place and to tame any rebellious flyaways.
With these steps, you’re all set to shine with your double lace braid high bun on your wedding day. It’s a style that’s not just elegant but also filled with your personal touch. Just a little practice, and you’ll have the bridal look of your dreams. Enjoy every moment!
2- Effortless Low Bun Instructions
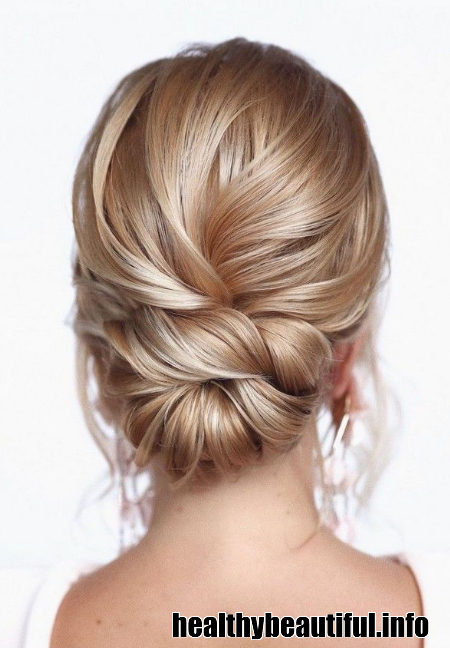
Creating an effortless low bun is a classic and elegant choice for a wedding hairstyle. Here’s a step-by-step guide that’s as easy to follow as chatting with a friend:
What You’ll Need:
- A trusty hairbrush
- Hair ties
- Bobby pins, lots of them
- Hairpins
- A spritz of your favorite hairspray
Step 1: Hair Prep
Imagine yourself, ready to create a timeless and elegant look for your wedding. Start with clean, dry hair. If your hair is too smooth and silky, you can add some texturizing spray or dry shampoo for a bit of grip. Give your hair a good brush to make sure it’s free from knots and tangles.
Step 2: Low Ponytail
Gather all your gorgeous hair at the nape of your neck and secure it with a hair tie. Keep it snug but not too tight, as you’ll be working around the ponytail.
Step 3: Divide and Conquer
Now, picture this – your low ponytail divided into two equal sections.
Step 4: Twist and Wrap
Starting with the left section of your ponytail, gently twist it. Wrap it around the base of your ponytail, tucking the ends underneath. Secure this twist with bobby pins, making sure it’s neatly tucked and pinned in place.
Step 5: Repeat the Twist
It’s a bit like telling a beautiful story twice. The right section of your ponytail gets the same twist treatment. Wrap it around the base of your ponytail, but in the opposite direction from the first twist. Pin it with bobby pins, tucking the ends under your bun.
Step 6: Perfect Your Bun
Imagine shaping a work of art. Adjust and arrange the twists until you’re perfectly content with the shape and fullness of your low bun. You can make it as loose or as snug as you fancy.
Step 7: Secure with Hairpins
Use hairpins to make sure the bun is stable and to make any necessary adjustments. If you have a hair donut or padding inside your bun, hide it away.
Step 8: Hairspray Magic
As a finishing touch, spray your elegant low bun with hairspray. It’s like adding a touch of fairy dust to set your hairstyle in place and keep any rebellious strands in check.
Step 9: Final Check
Stand back, take a look from all angles, and admire your stunning low bun.
Step 10: Personalize with Accessories
If you want to add a touch of your personality, consider decorating your low bun with a decorative hairpin, a small flower, or a bridal comb. It’s like adding your signature to this classic style.
There you have it – your effortless low bun that’s perfect for your wedding day. With a bit of practice, you can create this classic look with ease. It’s time to focus on savoring every moment and feeling like the beautiful bride you truly are.
3- Textured Ponytail Instructions
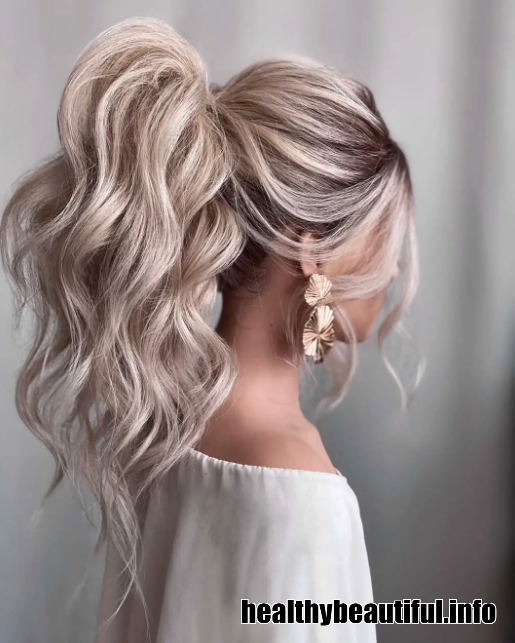
Creating a textured ponytail is a trendy and chic choice for a wedding hairstyle. Here’s a step-by-step guide to achieving this modern and stylish look:
What You’ll Need:
- Hairbrush
- Hair ties
- Bobby pins
- Hairpins
- Texturizing spray
- Hairspray
- Optional: decorative hairpins, fresh flowers, or bridal combs
Step 1: Hair Prep
Start by envisioning yourself looking effortlessly elegant on your wedding day. Begin with clean, dry hair. To add texture and grip, spritz your hair with some texturizing spray. Give your hair a good brush to remove any tangles.
Step 2: Create a Mid-High Ponytail
Imagine gathering your hair at the midpoint of your head, somewhere between the nape of your neck and the crown. Secure it with a hair tie. This is where the magic begins.
Step 3: Section the Ponytail
Now, picture this – your ponytail divided into two sections. Leave a smaller section of hair loose near the nape of your neck.
Step 4: Add Texture to the Loose Section
This is where the ‘textured’ part comes into play. Tease and tousle the loose section of your hair to create volume and texture. It’s like giving your hair a playful, windswept look.
Step 5: Create a Bubble Effect
Take a hair tie and secure it around the teased section of your hair. You’ve just created the first bubble-like effect. Leave a bit of the ends poking out to give it a casual feel.
Step 6: Repeat and Stack Bubbles
Think of creating more bubbles – repeat the teasing and tying steps on the loose section of your hair, stacking the bubbles above the previous one. You can make as many bubbles as you like, depending on the length of your hair and the desired volume.
Step 7: Secure the Last Bubble
The final bubble should be a bit further up to give your ponytail a dynamic and cascading effect. Once you’ve achieved the desired volume, secure the last bubble with a hair tie.
Step 8: Perfect the Ponytail
Imagine adjusting and fluffing the bubbles until you’re delighted with the shape and texture. You can make the bubbles as loose or as tight as you prefer.
Step 9: Secure with Hairpins
Use bobby pins to make sure the bubbles are secure and to tuck away any stray strands.
Step 10: Lock It in with Hairspray
Finish with a spritz of hairspray to set your textured ponytail in place and to control any flyaways.
Step 11: Personalize with Accessories (Optional)
If you want to add a personal touch, consider embellishing your textured ponytail with decorative hairpins, fresh flowers, or bridal combs. It’s like adding a unique touch to your modern bridal look.
Now, with your textured ponytail, you’ll exude contemporary chic on your wedding day. With a little practice, you can create this trendy style with ease and confidence, allowing you to focus on enjoying every moment of your special day.
4- Curly and Natural Instructions
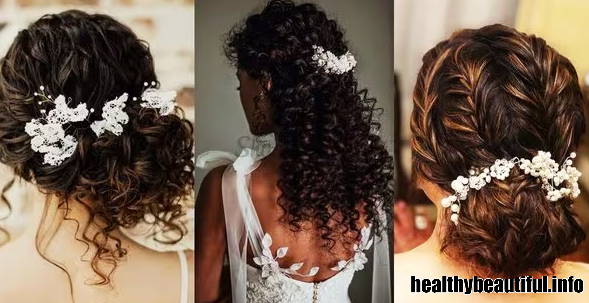
Creating a beautiful curly and natural wedding hairstyle is all about embracing your unique beauty. Here’s a step-by-step guide to help you achieve a stunning look for your special day:
What You’ll Need:
- Hair products for your hair type (curl enhancers, leave-in conditioner, etc.)
- Wide-tooth comb
- Hair ties or bobby pins
- Hairspray
- Optional: decorative hairpins, fresh flowers, or bridal combs
Step 1: Hair Prep
Imagine starting with your natural, clean, and well-conditioned hair. Use hair products tailored to your specific curl type to enhance and define your curls. This step is all about embracing and celebrating your natural texture.
Step 2: Create Your Part
Decide where you want your part to be – a center part, a side part, or whatever makes you feel the most beautiful. Use a wide-tooth comb to create a clean parting.
Step 3: Section Your Hair
Divide your hair into manageable sections. This makes it easier to work with your curls.
Step 4: Start Styling
Imagine working with one section at a time. You can choose to define your curls further using curling irons or let them air dry for a more natural look. If you’re using heat styling tools, make sure to protect your hair with a heat protectant.
Step 5: Pin Up and Set
As you style each section, pin it up with hair ties or bobby pins to maintain the shape and definition. This also allows you to work on the next section without interference.
Step 6: Repeat
Continue the styling process for all sections of your hair. Take your time to ensure each curl is perfect.
Step 7: Final Touches
Once you’ve styled all sections, take a moment to admire your beautiful curls. Use a mirror to see your hairstyle from different angles and ensure it’s perfect.
Step 8: Lock in Your Look
Finish with a spritz of hairspray to set your natural and curly wedding hairstyle in place. This step helps control frizz and keeps your curls looking fabulous.
Step 9: Personalize with Accessories (Optional)
If you want to add a touch of elegance or a personal flair, consider adding decorative hairpins, fresh flowers, or bridal combs. These accessories can complement your natural curls beautifully.
With your curly and natural wedding hairstyle, you’ll radiate authenticity and celebrate your unique beauty on your special day. Embrace your curls and let your true self shine through. Enjoy every moment, knowing that you are stunning just the way you are.
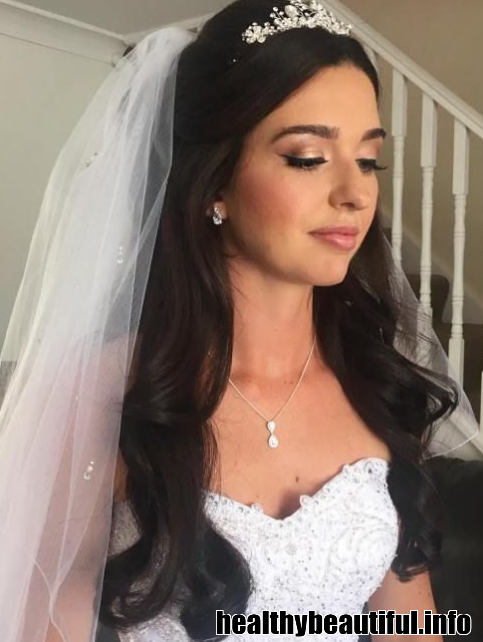
5- Classic Updo with a Tiara Instructions
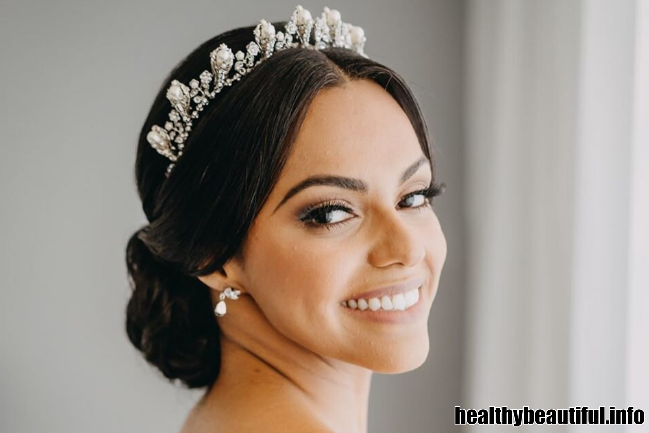
Creating a classic updo with a tiara is a timeless and elegant choice for a wedding hairstyle. Here’s a step-by-step guide to help you achieve this regal look for your special day:
What You’ll Need:
- Hairbrush
- Hair ties or bobby pins
- Hairpins
- Hairspray
- Tiara or hair accessory
- Optional: texturizing spray or hair donut for added volume
Step 1: Hair Prep
Start with clean, dry hair. If your hair is too smooth, you can add texturizing spray or dry shampoo for extra grip. Brush your hair thoroughly to ensure it’s free from knots and tangles.
Step 2: Create a High Ponytail
Gather your hair at the crown of your head and secure it with a hair tie. This will be the base for your updo. If you want additional volume, consider using a hair donut or padding and placing it at the base of the ponytail.
Step 3: Twist and Pin
Imagine dividing your high ponytail into two equal sections. Take the left section, twist it gently, and wrap it around the base of the ponytail, tucking the ends underneath. Secure the twist with bobby pins.
Step 4: Repeat with the Right Section
Repeat the twisting and pinning process with the right section, wrapping it in the opposite direction from the first twist. Ensure the ends are neatly tucked and secure with bobby pins.
Step 5: Perfect the Bun
Picture yourself adjusting and arranging the twists until you’re pleased with the shape of your bun. You can make it as loose or as tight as you prefer.
Step 6: Secure with Hairpins
Use hairpins to ensure the bun is stable and to make any necessary adjustments. If you have a hair donut or padding in your updo, ensure it’s well-concealed.
Step 7: Lock in Your Look
Finish with a generous spritz of hairspray to set your updo in place and tame any flyaways. This step adds the finishing touch to your elegant hairstyle.
Step 8: Add Your Tiara
Place your tiara or chosen hair accessory on your head, just above the bun. Secure it in place with hairpins to ensure it stays in position throughout the day.
Step 9: Final Check
Take a moment to examine your classic updo from different angles to ensure it looks neat and secure.
With your classic updo and tiara, you’ll exude timeless elegance on your wedding day. This regal hairstyle beautifully complements your bridal attire and adds a touch of royal charm. Enjoy every moment, knowing that you look and feel like a true queen on your special day.
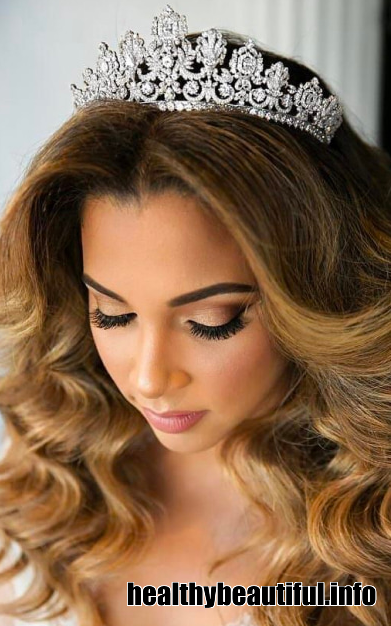
6- Vintage Waves and Tiara Instructions
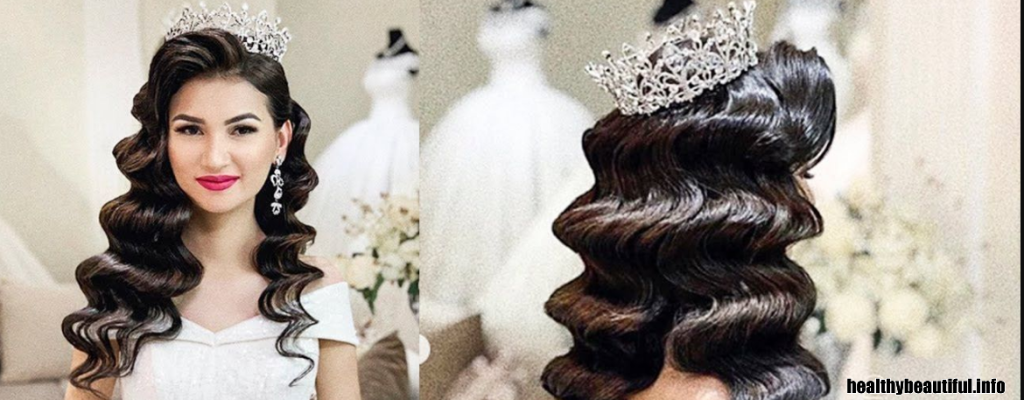
Creating vintage waves with a tiara is a classic and glamorous choice for a wedding hairstyle. Here’s a step-by-step guide to help you achieve this elegant and timeless look for your special day:
What You’ll Need:
- Hairbrush
- Curling iron or curling wand
- Heat protectant
- Hairpins
- Hairspray
- Tiara or hair accessory
- Optional: decorative hairpins or combs
Step 1: Hair Prep
Begin with clean, dry hair. Apply heat protectant to shield your hair from the curling iron’s heat. Brush your hair thoroughly to remove any knots and tangles.
Step 2: Create Vintage Waves
Imagine using a curling iron or wand to create soft, vintage waves. Take small sections of your hair and wrap them around the curling iron, holding for a few seconds before releasing. Continue this process throughout your hair, working in sections until all your hair is beautifully curled.
Step 3: Finger Comb the Curls
After curling your hair, gently finger comb through the curls to create the vintage wave effect. This will soften the curls and give them that timeless, vintage appearance.
Step 4: Secure with Hairpins
Imagine using hairpins to secure the waves in place. Pin any loose or unruly curls to create a uniform and elegant look.
Step 5: Lock in Your Look
Finish with a generous spritz of hairspray to set your vintage waves in place and to control any flyaways. This step is essential for maintaining the classic style throughout your wedding day.
Step 6: Add Your Tiara
Place your tiara or chosen hair accessory on your head, just above the waves. Secure it in place with hairpins to ensure it stays in position and adds an extra touch of elegance to your hairstyle.
Step 7: Final Touches
If you want to personalize your vintage look further, consider adding decorative hairpins or combs to complement the tiara and enhance the overall charm of your hairstyle.
With your vintage waves and tiara, you’ll exude timeless grace on your wedding day. This classic hairstyle beautifully complements your bridal attire and adds a touch of old-world glamour to your look. Enjoy every moment, knowing that you’re a picture of timeless beauty on your special day.
7- Princess Braid with Tiara Instructions
Creating a princess braid with a tiara is a regal and enchanting choice for a wedding hairstyle. Here’s a step-by-step guide to help you achieve this fairy tale-inspired look for your special day:
What You’ll Need:
- Hairbrush
- Hair ties
- Bobby pins
- Hairpins
- Hairspray
- Tiara or hair accessory
- Optional: decorative hairpins, fresh flowers, or bridal combs
Step 1: Hair Prep
Begin with clean, dry hair. Brush your hair thoroughly to remove any knots and tangles, making it smooth and manageable.
Step 2: Create a Center Part
Imagine parting your hair down the center to create two equal sections. This parting will set the stage for your princess braid.
Step 3: French Braid One Side
Begin by French braiding one side of your hair. Start near your forehead and gather small sections of hair as you braid along your scalp. As you move down, keep adding more hair to the braid. Braid until you reach the nape of your neck and secure it with a hair tie.
Step 4: Repeat on the Other Side
Now, repeat the French braiding process on the other side of your hair. Create a symmetrical braid by gathering hair along the scalp and securing it at the nape of your neck. Use a hair tie to secure this braid.
Step 5: Pull on the Braids
Imagine gently pulling on the edges of the braids to create a fuller and more intricate look. This will give your princess braid a more regal appearance.
Step 6: Cross and Secure
Take one of the braids and wrap it across the back of your head, just above the nape of your neck. Secure it in place with bobby pins.
Step 7: Repeat with the Other Braid
Repeat the same process with the second braid, crossing it over the first and securing it with bobby pins. This creates the illusion of a continuous braid encircling your head.
Step 8: Lock in Your Look
Finish with a generous spritz of hairspray to set your princess braid in place and to control any flyaways.
Step 9: Add Your Tiara
Place your tiara or chosen hair accessory just above the braids and secure it with hairpins to ensure it stays in position and adds a touch of royal elegance to your hairstyle.
Step 10: Personalize with Accessories (Optional)
If you wish to enhance your princess look, consider adding decorative hairpins, fresh flowers, or bridal combs to your hairstyle.
With your princess braid and tiara, you’ll feel like royalty on your wedding day. This enchanting hairstyle beautifully complements your bridal attire and adds a touch of fairy tale magic to your look. Enjoy every moment, knowing that you are the queen of your own love story.
8- Half-Up, Half-Down with Tiara Instructions
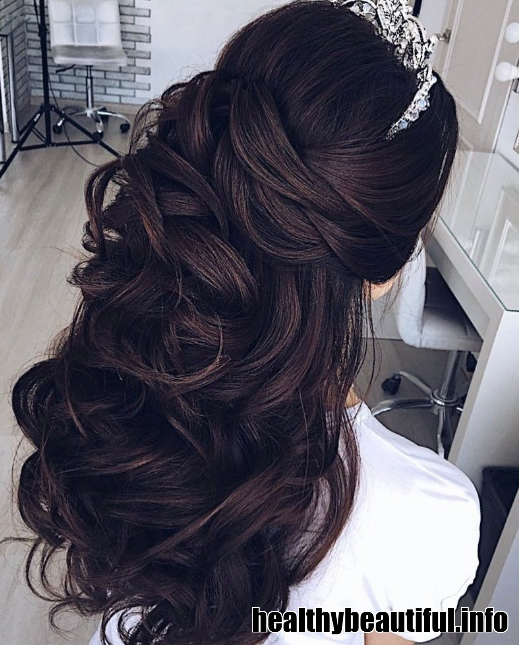
Creating a half-up, half-down hairstyle with a tiara is a romantic and elegant choice for your wedding day. Here’s a step-by-step guide to help you achieve this lovely and timeless look:
What You’ll Need:
- Hairbrush
- Hair ties or bobby pins
- Hairpins
- Hairspray
- Tiara or hair accessory
- Optional: decorative hairpins, fresh flowers, or bridal combs
Step 1: Hair Prep
Start with clean, dry hair. Brush your hair thoroughly to ensure it’s free from knots and tangles, making it smooth and manageable.
Step 2: Create a Center Part
Imagine parting your hair down the center to create two equal sections. This parting will set the stage for your half-up, half-down style.
Step 3: Gather the Top Section
Gather the top section of your hair from both sides, pulling it towards the back of your head. This is the part that will be styled into an updo.
Step 4: Secure with a Hair Tie
Use a hair tie to secure the top section into a half-up ponytail. Adjust it to your desired height, which could be higher or lower, depending on your preference.
Step 5: Create Volume
Gently tease the hair in the half-up ponytail to create volume and a slightly messy, romantic look. This will give your hairstyle more texture.
Step 6: Pin Up the Top Section
Imagine folding the teased half-up section and securing it in place with bobby pins. You can arrange it in a way that creates a small, chic bun or just a softly gathered look.
Step 7: Lock in Your Look
Finish with a generous spritz of hairspray to set your half-up section in place and to control any flyaways.
Step 8: Add Your Tiara
Place your tiara or chosen hair accessory on the crown of your head, just above the bun or gathered half-up section. Secure it with hairpins to ensure it stays in position and adds a touch of bridal elegance to your hairstyle.
Step 9: Personalize with Accessories (Optional)
If you want to further enhance your romantic look, consider adding decorative hairpins, fresh flowers, or bridal combs to your hairstyle.
With your half-up, half-down hairstyle and tiara, you’ll exude timeless beauty on your wedding day. This romantic and versatile style beautifully complements your bridal attire and adds a touch of elegance to your look. Enjoy every moment, knowing that you are the picture of love and beauty on your special day.
9- Sleek Low Ponytail with Tiara Instructions
Creating a sleek low ponytail with a tiara is a modern and sophisticated choice for a wedding hairstyle. Here’s a step-by-step guide to help you achieve this elegant and refined look:
What You’ll Need:
- Hairbrush
- Hair ties or bobby pins
- Hairpins
- Hairspray
- Tiara or hair accessory
- Hair straightener (optional)
- Optional: decorative hairpins, fresh flowers, or bridal combs
Step 1: Hair Prep
Start with clean, dry hair. Brush your hair thoroughly to ensure it’s smooth and free from knots and tangles. If your hair is naturally curly or wavy and you prefer a sleek look, you can use a hair straightener to straighten it.
Step 2: Create a Center Part
Imagine parting your hair down the center to create two equal sections. This parting will give your hairstyle a balanced and elegant appearance.
Step 3: Gather Your Hair
Gather all your hair at the nape of your neck, making sure it’s smooth and sleek. This is where your sleek low ponytail will be.
Step 4: Secure with a Hair Tie
Use a hair tie to secure the low ponytail. Make sure it’s snug but not too tight to maintain a sleek and refined look.
Step 5: Smooth and Shine
Imagine smoothing the hair in your ponytail with a bit of hairspray to add shine and keep it neat and polished.
Step 6: Add Your Tiara
Place your tiara or chosen hair accessory on the crown of your head, just above the low ponytail. Secure it with hairpins to ensure it stays in position and adds a touch of bridal sophistication to your hairstyle.
Step 7: Personalize with Accessories (Optional)
If you want to add a touch of uniqueness to your sleek look, consider adding decorative hairpins, fresh flowers, or bridal combs to your hairstyle.
With your sleek low ponytail and tiara, you’ll exude modern elegance on your wedding day. This sophisticated style beautifully complements your bridal attire and adds a touch of refinement to your overall look. Enjoy every moment, knowing that you are the epitome of contemporary beauty on your special day.
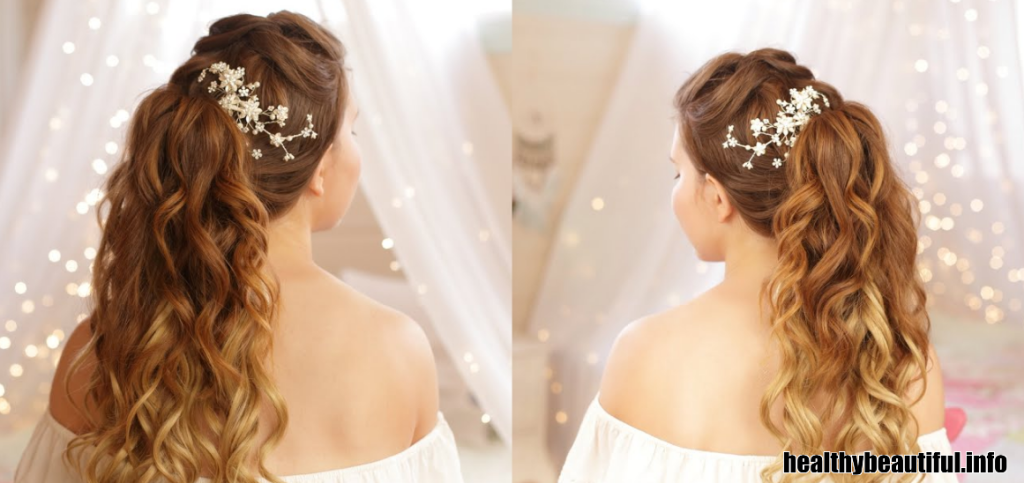
10- Bohemian Waves and Tiara Instructions
Creating bohemian waves with a tiara is a romantic and ethereal choice for a wedding hairstyle. Here’s a step-by-step guide to help you achieve this relaxed and enchanting look:
What You’ll Need:
- Hairbrush
- Curling iron or curling wand
- Heat protectant
- Hairpins
- Hairspray
- Tiara or hair accessory
- Optional: decorative hairpins, fresh flowers, or bridal combs
Step 1: Hair Prep
Begin with clean, dry hair. Apply heat protectant to safeguard your hair from the curling iron’s heat. Brush your hair thoroughly to ensure it’s free from knots and tangles.
Step 2: Create Bohemian Waves
Imagine using a curling iron or wand to create loose and relaxed waves. Take medium-sized sections of your hair and wrap them around the curling iron, holding for a few seconds before releasing. Continue this process throughout your hair, working in sections until all your hair is beautifully curled.
Step 3: Finger Comb the Waves
After curling your hair, gently finger comb through the waves to create a more relaxed and bohemian look. This step softens the curls and gives them a carefree appearance.
Step 4: Lock in Your Look
Finish with a generous spritz of hairspray to set your bohemian waves in place and to control any flyaways.
Step 5: Add Your Tiara
Place your tiara or chosen hair accessory just above the waves. Secure it with hairpins to ensure it stays in position and adds a touch of bohemian romance to your hairstyle.
Step 6: Personalize with Accessories (Optional)
If you want to enhance your bohemian look, consider adding decorative hairpins, fresh flowers, or bridal combs to your hairstyle. These accessories can complement your bohemian waves beautifully.
With your bohemian waves and tiara, you’ll exude romantic charm on your wedding day. This ethereal hairstyle beautifully complements your bridal attire and adds a touch of whimsical beauty to your look. Enjoy every moment, knowing that you are a vision of love and enchantment on your special day.
11- Fishtail Braid and Tiara Instructions
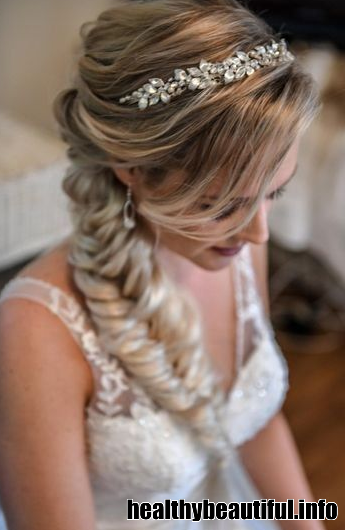
Creating a fishtail braid with a tiara is a stylish and elegant choice for a wedding hairstyle. Here’s a step-by-step guide to help you achieve this intricate and charming look:
What You’ll Need:
- Hairbrush
- Hair ties or bobby pins
- Hairpins
- Hairspray
- Tiara or hair accessory
- Optional: decorative hairpins, fresh flowers, or bridal combs
Step 1: Hair Prep
Start with clean, dry hair. Brush your hair thoroughly to ensure it’s free from knots and tangles, making it smooth and manageable.
Step 2: Create a Center Part
Imagine parting your hair down the center to create two equal sections. This parting will give your hairstyle a balanced and elegant appearance.
Step 3: Gather Your Hair
Gather all your hair to one side, making sure it’s smooth and sleek. This is where your fishtail braid will begin.
Step 4: Divide into Two Sections
Divide your gathered hair into two equal sections, holding one in each hand. This is the starting point for your fishtail braid.
Step 5: Begin the Fishtail Braid
Imagine taking a small strand of hair from the outer edge of one section and crossing it over to the inner edge of the opposite section. Repeat this process, alternating sides and adding small strands as you go. This creates the fishtail braid pattern.
Step 6: Continue Braiding
Continue braiding in this manner, working your way down to the ends of your hair. Ensure that the braid is tight and secure.
Step 7: Secure with a Hair Tie
Use a hair tie to secure the end of your fishtail braid. You can adjust the tightness of the braid according to your preference.
Step 8: Pull Apart the Braid
Gently pull apart the sections of the fishtail braid to create a more voluminous and textured look. This step adds charm and intricacy to your hairstyle.
Step 9: Lock in Your Look
Finish with a generous spritz of hairspray to set your fishtail braid in place and to control any flyaways.
Step 10: Add Your Tiara
Place your tiara or chosen hair accessory on top of the fishtail braid. Secure it with hairpins to ensure it stays in position and adds a touch of elegance to your hairstyle.
Step 11: Personalize with Accessories (Optional)
If you want to enhance your fishtail braid look, consider adding decorative hairpins, fresh flowers, or bridal combs to your hairstyle. These accessories can complement your braided style beautifully.
With your fishtail braid and tiara, you’ll exude style and grace on your wedding day. This intricate hairstyle beautifully complements your bridal attire and adds a touch of sophistication to your overall look. Enjoy every moment, knowing that you are a vision of beauty and charm on your special day.
12- High Bun with Tiara Instructions
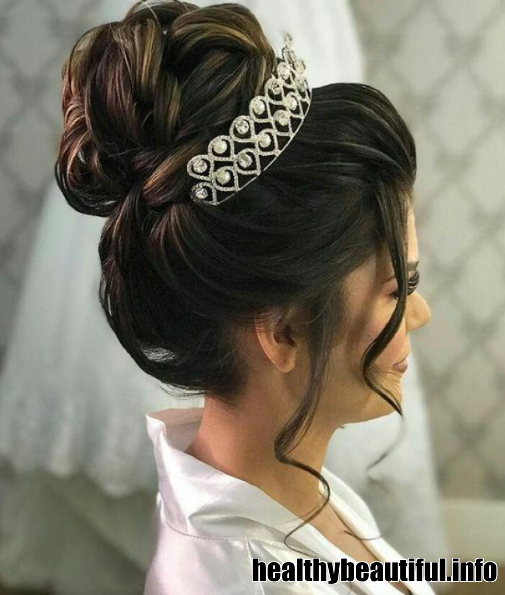
Creating a high bun with a tiara is a classic and elegant choice for a wedding hairstyle. Here’s a step-by-step guide to help you achieve this timeless and regal look:
What You’ll Need:
- Hairbrush
- Hair ties or bobby pins
- Hairpins
- Hairspray
- Tiara or hair accessory
- Optional: decorative hairpins, fresh flowers, or bridal combs
Step 1: Hair Prep
Start with clean, dry hair. Brush your hair thoroughly to ensure it’s free from knots and tangles, making it smooth and manageable.
Step 2: Create a High Ponytail
Imagine gathering all your hair at the crown of your head. This is where your high bun will be. Secure it with a hair tie. If you want additional volume, consider using a hair donut or padding and placing it at the base of the ponytail.
Step 3: Twist and Wrap
Now, picture dividing your high ponytail into two equal sections. Take the left section, gently twist it, and wrap it around the base of the ponytail, tucking the ends underneath. Secure this twist with bobby pins.
Step 4: Repeat with the Right Section
Repeat the twisting and pinning process with the right section, wrapping it in the opposite direction from the first twist. Ensure the ends are neatly tucked and secure with bobby pins.
Step 5: Perfect the Bun
Imagine adjusting and arranging the twists until you’re pleased with the shape and fullness of your high bun. You can make it as loose or as tight as you prefer.
Step 6: Secure with Hairpins
Use hairpins to ensure the bun is stable and to make any necessary adjustments. If you have a hair donut or padding inside your bun, ensure it’s well-concealed.
Step 7: Lock in Your Look
Finish with a generous spritz of hairspray to set your high bun in place and to control any flyaways.
Step 8: Add Your Tiara
Place your tiara or chosen hair accessory on top of the high bun. Secure it with hairpins to ensure it stays in position and adds a touch of bridal elegance to your hairstyle.
Step 9: Personalize with Accessories (Optional)
If you want to enhance your high bun look, consider adding decorative hairpins, fresh flowers, or bridal combs to your hairstyle. These accessories can complement your regal style beautifully.
With your high bun and tiara, you’ll exude timeless grace on your wedding day. This classic hairstyle beautifully complements your bridal attire and adds a touch of sophistication to your look. Enjoy every moment, knowing that you are a vision of elegance and charm on your special day.
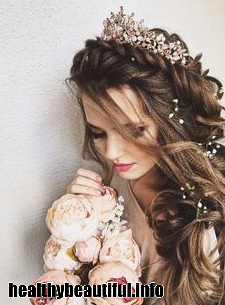
13- Floral Crown and Tiara Instructions
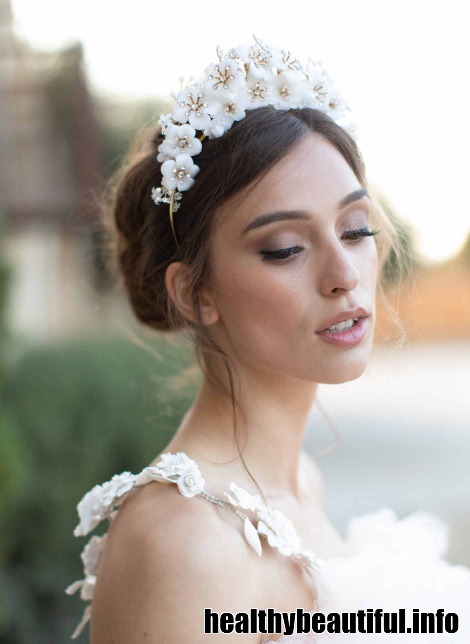
Creating a wedding hairstyle with a floral crown and tiara is a beautiful and romantic choice. Here’s a step-by-step guide to help you achieve this ethereal and enchanting look:
What You’ll Need:
- Hairbrush
- Hair ties or bobby pins
- Hairpins
- Hairspray
- Floral crown
- Tiara or hair accessory
- Optional: decorative hairpins or bridal combs
Step 1: Hair Prep
Start with clean, dry hair. Brush your hair thoroughly to ensure it’s free from knots and tangles, making it smooth and manageable.
Step 2: Decide on Placement
Imagine where you want the floral crown and tiara to be placed. Typically, the floral crown is worn lower on the head, while the tiara or hair accessory is positioned higher.
Step 3: Create a Half-Up, Half-Down Style
Gather a section of hair from the front, near your temples, on both sides. Pull this hair backward and secure it at the back of your head using a hair tie. This creates a half-up, half-down hairstyle.
Step 4: Lock in Your Look
Finish with a generous spritz of hairspray to set the half-up section in place and to control any flyaways.
Step 5: Add the Floral Crown
Place the floral crown on your head, just above the half-up section. Secure it in place with hairpins to ensure it stays in position and adds a touch of romance to your hairstyle.
Step 6: Add the Tiara
Position the tiara or chosen hair accessory just above the floral crown, closer to the top of your head. Secure it with hairpins to ensure it stays in position and adds a touch of regal elegance to your hairstyle.
Step 7: Personalize with Accessories (Optional)
If you want to enhance your romantic look, consider adding decorative hairpins or bridal combs to your hairstyle. These accessories can complement your floral and tiara combination beautifully.
With your floral crown and tiara, you’ll exude a romantic and regal aura on your wedding day. This ethereal hairstyle beautifully complements your bridal attire and adds a touch of charm and sophistication to your look. Enjoy every moment, knowing that you are a vision of beauty and enchantment on your special day.
14- Classic Veil with Updo Instructions
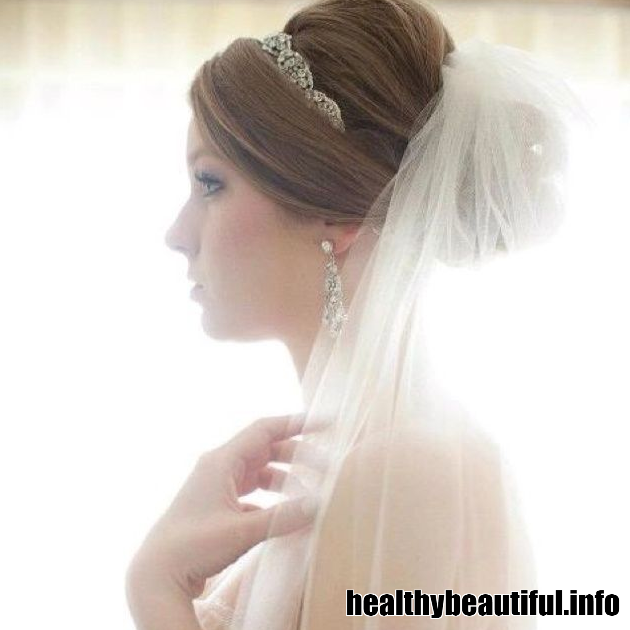
Creating a classic veil with an updo is a timeless and elegant choice for a wedding hairstyle. Here’s a step-by-step guide to help you achieve this traditional and refined look:
What You’ll Need:
- Hairbrush
- Hair ties or bobby pins
- Hairpins
- Hairspray
- Classic wedding veil
- Optional: decorative hairpins, fresh flowers, or bridal combs
Step 1: Hair Prep
Begin with clean, dry hair. Brush your hair thoroughly to ensure it’s free from knots and tangles, making it smooth and manageable.
Step 2: Create an Updo
Imagine gathering your hair into an updo of your choice. You can create a bun, chignon, or any other updo that you prefer. Secure it with bobby pins or hair ties, making sure it’s smooth and secure.
Step 3: Lock in Your Look
Finish with a generous spritz of hairspray to set your updo in place and to control any flyaways. This step is essential to maintain the classic style throughout your wedding day.
Step 4: Add the Classic Veil
Place the classic wedding veil on your head, securing it in your updo with hairpins to ensure it stays in position. The veil can be worn over your face for a traditional look during the ceremony and then lifted afterward.
Step 5: Personalize with Accessories (Optional)
If you want to enhance your classic look, consider adding decorative hairpins, fresh flowers, or bridal combs to your hairstyle. These accessories can complement the classic veil beautifully.
With your classic veil and updo, you’ll exude timeless elegance on your wedding day. This traditional hairstyle beautifully complements your bridal attire and adds a touch of refinement to your overall look. Enjoy every moment, knowing that you are a vision of grace and charm on your special day.
15- Birdcage Veil with Vintage Waves Instructions
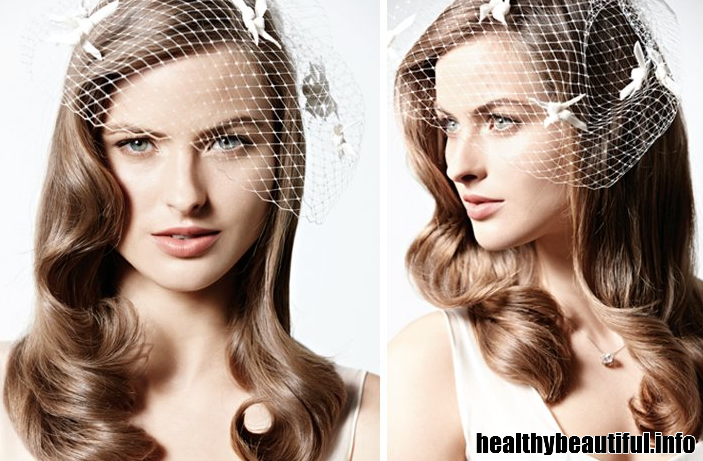
Creating a birdcage veil with vintage waves is a stylish and retro-inspired choice for a wedding hairstyle. Here’s a step-by-step guide to help you achieve this chic and timeless look:
What You’ll Need:
- Hairbrush
- Curling iron or curling wand
- Heat protectant
- Hairpins
- Hairspray
- Birdcage veil
- Optional: decorative hairpins, fresh flowers, or bridal combs
Step 1: Hair Prep
Begin with clean, dry hair. Brush your hair thoroughly to ensure it’s free from knots and tangles. Apply heat protectant to safeguard your hair from the curling iron’s heat.
Step 2: Create Vintage Waves
Imagine using a curling iron or wand to create soft and loose vintage waves. Take medium-sized sections of your hair and wrap them around the curling iron, holding for a few seconds before releasing. Continue this process throughout your hair, working in sections until all your hair is beautifully curled.
Step 3: Finger Comb the Waves
After curling your hair, gently finger comb through the waves to create a more relaxed and vintage look. This will soften the curls and give them a retro-inspired appearance.
Step 4: Lock in Your Look
Finish with a generous spritz of hairspray to set your vintage waves in place and to control any flyaways.
Step 5: Add the Birdcage Veil
Place the birdcage veil over your head, securing it with hairpins to ensure it stays in position. The birdcage veil typically covers part of your face, giving you a chic and mysterious look.
Step 6: Personalize with Accessories (Optional)
If you want to enhance your vintage look, consider adding decorative hairpins, fresh flowers, or bridal combs to your hairstyle. These accessories can complement the vintage waves and birdcage veil beautifully.
With your birdcage veil and vintage waves, you’ll exude retro charm on your wedding day. This chic hairstyle beautifully complements your bridal attire and adds a touch of timeless elegance to your look. Enjoy every moment, knowing that you are a picture of style and sophistication on your special day.
16- Floral Crown with Loose Bohemian Waves Instructions

Creating a wedding hairstyle with a floral crown and loose bohemian waves is a romantic and enchanting choice. Here’s a step-by-step guide to help you achieve this ethereal and free-spirited look:
What You’ll Need:
- Hairbrush
- Curling iron or curling wand
- Heat protectant
- Hairpins
- Hairspray
- Floral crown
- Optional: decorative hairpins, fresh flowers, or bridal combs
Step 1: Hair Prep
Begin with clean, dry hair. Brush your hair thoroughly to ensure it’s free from knots and tangles. Apply heat protectant to safeguard your hair from the curling iron’s heat.
Step 2: Create Loose Bohemian Waves
Imagine using a curling iron or wand to create loose and free-spirited waves. Take medium-sized sections of your hair and wrap them around the curling iron, holding for a few seconds before releasing. Continue this process throughout your hair, working in sections until all your hair is beautifully waved.
Step 3: Finger Comb the Waves
After curling your hair, gently finger comb through the waves to create a more relaxed and bohemian look. This step softens the curls and gives them an ethereal appearance.
Step 4: Lock in Your Look
Finish with a generous spritz of hairspray to set your loose bohemian waves in place and to control any flyaways.
Step 5: Add the Floral Crown
Place the floral crown on your head, securing it with hairpins to ensure it stays in position. The crown can be worn as low or as high as you prefer, depending on the look you desire.
Step 6: Personalize with Accessories (Optional)
If you want to enhance your bohemian look, consider adding decorative hairpins, fresh flowers, or bridal combs to your hairstyle. These accessories can complement the loose waves and floral crown beautifully.
With your floral crown and loose bohemian waves, you’ll exude romantic charm on your wedding day. This ethereal hairstyle beautifully complements your bridal attire and adds a touch of enchantment to your look. Enjoy every moment, knowing that you are a vision of love and free-spirited beauty on your special day.
17- Headband with Sleek Ponytail Instructions
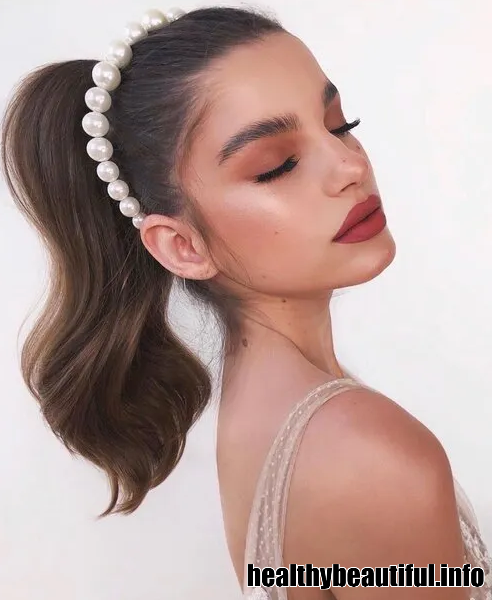
Creating a wedding hairstyle with a headband and a sleek ponytail is a modern and sophisticated choice. Here’s a step-by-step guide to help you achieve this elegant and contemporary look:
What You’ll Need:
- Hairbrush
- Hair ties or bobby pins
- Hairpins
- Hairspray
- Decorative headband
- Optional: decorative hairpins, fresh flowers, or bridal combs
Step 1: Hair Prep
Start with clean, dry hair. Brush your hair thoroughly to ensure it’s smooth and free from knots and tangles.
Step 2: Create a Sleek Ponytail
Gather all your hair at the back of your head, making sure it’s smooth and sleek. Use a hair tie to secure a low or mid-level ponytail, depending on your preference.
Step 3: Lock in Your Look
Finish with a generous spritz of hairspray to set your sleek ponytail in place and to control any flyaways. This step is crucial to maintain the polished style throughout your wedding day.
Step 4: Add the Headband
Place the decorative headband on your head, positioning it just above the ponytail. Secure it in place with hairpins to ensure it stays in position and adds a touch of elegance to your hairstyle.
Step 5: Personalize with Accessories (Optional)
If you want to enhance your modern look, consider adding decorative hairpins, fresh flowers, or bridal combs to your hairstyle. These accessories can complement the headband and sleek ponytail beautifully.
With your headband and sleek ponytail, you’ll exude modern elegance on your wedding day. This sophisticated hairstyle beautifully complements your bridal attire and adds a touch of refinement to your overall look. Enjoy every moment, knowing that you are a picture of contemporary beauty on your special day.
18- Tiara with a Classic Half-Up, Half-Down Instructions
Creating a wedding hairstyle with a tiara and a classic half-up, half-down look is a timeless and elegant choice. Here’s a step-by-step guide to help you achieve this lovely and versatile style:
What You’ll Need:
- Hairbrush
- Hair ties or bobby pins
- Hairpins
- Hairspray
- Tiara or hair accessory
- Optional: decorative hairpins, fresh flowers, or bridal combs
Step 1: Hair Prep
Begin with clean, dry hair. Brush your hair thoroughly to ensure it’s smooth and free from knots and tangles, making it manageable.
Step 2: Create a Center Part
Imagine parting your hair down the center to create two equal sections. This parting will set the stage for your half-up, half-down style.
Step 3: Gather the Top Section
Gather the top section of your hair from both sides, pulling it towards the back of your head. This is the part that will be styled into an updo.
Step 4: Secure with a Hair Tie
Use a hair tie to secure the top section into a half-up ponytail. Adjust it to your desired height, which could be higher or lower, depending on your preference.
Step 5: Lock in Your Look
Finish with a generous spritz of hairspray to set the half-up section in place and to control any flyaways.
Step 6: Add Your Tiara
Place your tiara or chosen hair accessory on the crown of your head, just above the half-up section. Secure it with hairpins to ensure it stays in position and adds a touch of bridal elegance to your hairstyle.
Step 7: Personalize with Accessories (Optional)
If you want to enhance your classic look, consider adding decorative hairpins, fresh flowers, or bridal combs to your hairstyle. These accessories can complement the tiara and half-up, half-down style beautifully.
With your tiara and classic half-up, half-down hairstyle, you’ll exude timeless beauty on your wedding day. This romantic and versatile style beautifully complements your bridal attire and adds a touch of elegance to your look. Enjoy every moment, knowing that you are the picture of love and grace on your special day.
19- Flower Comb with Messy Bun Instructions
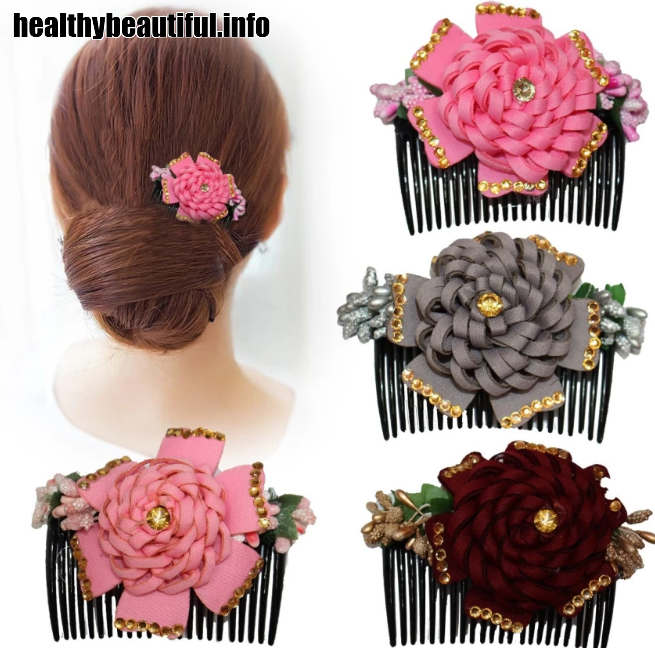
Creating a wedding hairstyle with a flower comb and a messy bun is a romantic and whimsical choice. Here’s a step-by-step guide to help you achieve this lovely and ethereal look:
What You’ll Need:
- Hairbrush
- Hair ties or bobby pins
- Hairpins
- Hairspray
- Flower comb or hair accessory
- Optional: decorative hairpins or fresh flowers
Step 1: Hair Prep
Start with clean, dry hair. Brush your hair thoroughly to ensure it’s smooth and free from knots and tangles, making it manageable.
Step 2: Create a Messy Bun
Gather your hair at the back of your head to create a bun. You can make it as loose and messy as you prefer. Secure it with bobby pins or a hair tie. The messy bun adds a carefree and romantic touch to your style.
Step 3: Lock in Your Look
Finish with a generous spritz of hairspray to set your messy bun in place and to control any flyaways. This step ensures that your hairstyle maintains its charm throughout your wedding day.
Step 4: Add the Flower Comb
Place the flower comb or chosen hair accessory in your bun or in the hair around your bun. Secure it with hairpins to ensure it stays in position and adds a touch of romance to your hairstyle.
Step 5: Personalize with Accessories (Optional)
If you want to enhance your romantic look, consider adding decorative hairpins or fresh flowers to your hairstyle. These accessories can complement the flower comb and messy bun beautifully.
With your flower comb and messy bun, you’ll exude a whimsical and enchanting aura on your wedding day. This ethereal hairstyle beautifully complements your bridal attire and adds a touch of love and charm to your overall look. Enjoy every moment, knowing that you are a vision of grace and beauty on your special day.
20- Crystal Headpiece with Slicked-Back Hair Instructions
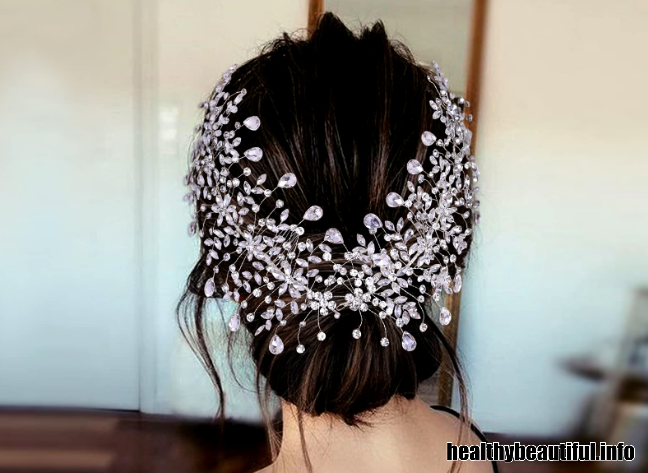
Creating a wedding hairstyle with a crystal headpiece and slicked-back hair is a modern and elegant choice. Here’s a step-by-step guide to help you achieve this sophisticated and glamorous look:
What You’ll Need:
- Hairbrush
- Hair ties or bobby pins
- Hairpins
- Hairspray
- Crystal headpiece or hair accessory
- Styling gel or hair wax
- Optional: decorative hairpins, fresh flowers, or bridal combs
Step 1: Hair Prep
Begin with clean, dry hair. Brush your hair thoroughly to ensure it’s smooth and free from knots and tangles, making it manageable.
Step 2: Apply Styling Gel or Hair Wax
Imagine applying a small amount of styling gel or hair wax to your hair to help create a sleek and polished look. Work the product through your hair, paying extra attention to the roots and the top of your head.
Step 3: Slick Back Your Hair
Gently comb your hair back to create a slicked-back look. Ensure that your hair is smooth and flat against your scalp for a modern and polished appearance.
Step 4: Lock in Your Look
Finish with a generous spritz of hairspray to set your slicked-back hair in place and to control any flyaways. This step is crucial to maintain the sleek style throughout your wedding day.
Step 5: Add the Crystal Headpiece
Place the crystal headpiece or chosen hair accessory on the crown of your head, just above the slicked-back hair. Secure it with hairpins to ensure it stays in position and adds a touch of bridal elegance to your hairstyle.
Step 6: Personalize with Accessories (Optional)
If you want to enhance your modern look, consider adding decorative hairpins, fresh flowers, or bridal combs to your hairstyle. These accessories can complement the crystal headpiece and slicked-back hair beautifully.
With your crystal headpiece and slicked-back hair, you’ll exude contemporary elegance on your wedding day. This polished hairstyle beautifully complements your bridal attire and adds a touch of refinement to your overall look. Enjoy every moment, knowing that you are a vision of modern beauty and sophistication on your special day.
21- Juliet Cap Veil with Vintage Updo Instructions
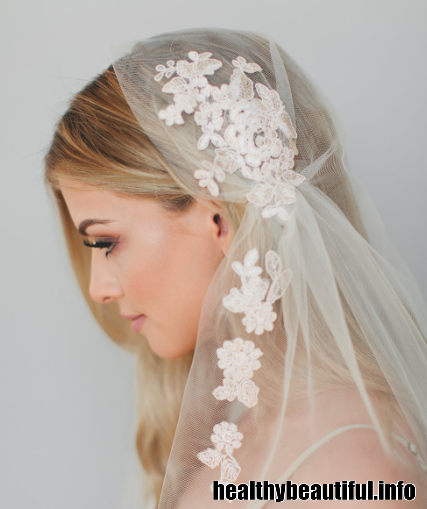
Creating a wedding hairstyle with a Juliet cap veil and a vintage updo is a romantic and timeless choice. Here’s a step-by-step guide to help you achieve this lovely and classic look:
What You’ll Need:
- Hairbrush
- Hair ties or bobby pins
- Hairpins
- Hairspray
- Juliet cap veil
- Optional: decorative hairpins, fresh flowers, or bridal combs
Step 1: Hair Prep
Start with clean, dry hair. Brush your hair thoroughly to ensure it’s smooth and free from knots and tangles, making it manageable.
Step 2: Create a Vintage Updo
Imagine gathering your hair into an updo of your choice with a vintage flair. You can create a bun, chignon, or any other updo that you prefer. Secure it with bobby pins or hair ties, making sure it’s smooth and secure.
Step 3: Lock in Your Look
Finish with a generous spritz of hairspray to set your vintage updo in place and to control any flyaways. This step is essential to maintain the classic style throughout your wedding day.
Step 4: Add the Juliet Cap Veil
Place the Juliet cap veil on your head, securing it with hairpins to ensure it stays in position. The veil typically covers part of your face, giving you a romantic and timeless look.
Step 5: Personalize with Accessories (Optional)
If you want to enhance your vintage look, consider adding decorative hairpins, fresh flowers, or bridal combs to your hairstyle. These accessories can complement the Juliet cap veil and vintage updo beautifully.
With your Juliet cap veil and vintage updo, you’ll exude timeless beauty on your wedding day. This romantic hairstyle beautifully complements your bridal attire and adds a touch of elegance to your look. Enjoy every moment, knowing that you are a vision of love and grace on your special day.
22- Mantilla Veil with Long Flowing Hair Instructions
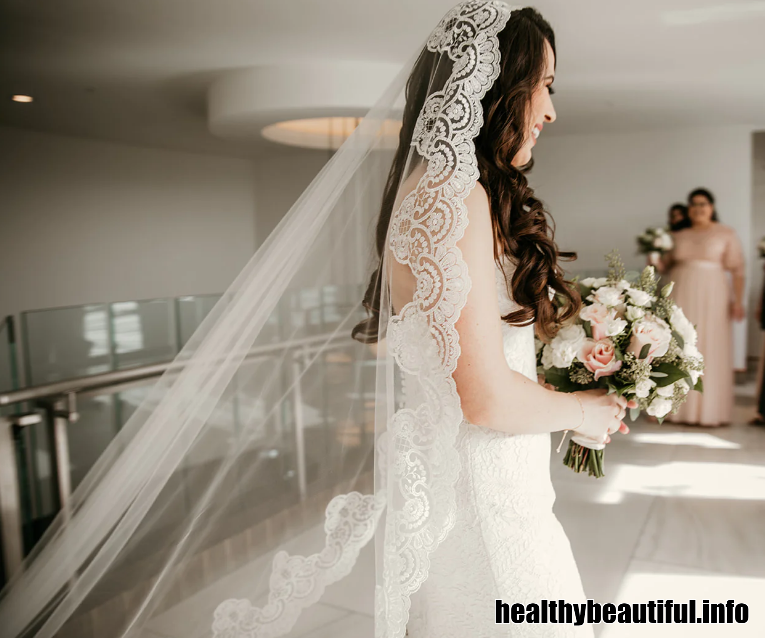
Creating a wedding hairstyle with a mantilla veil and long flowing hair is a classic and elegant choice. Here’s a step-by-step guide to help you achieve this timeless and sophisticated look:
What You’ll Need:
- Hairbrush
- Hair ties or bobby pins
- Hairpins
- Hairspray
- Mantilla veil
- Optional: decorative hairpins, fresh flowers, or bridal combs
Step 1: Hair Prep
Begin with clean, dry hair. Brush your hair thoroughly to ensure it’s smooth and free from knots and tangles, making it manageable.
Step 2: Part Your Hair
Imagine parting your hair in your desired style. You can part it in the middle, to the side, or any way you prefer.
Step 3: Lock in Your Look
Finish with a generous spritz of hairspray to set your long flowing hair in place and to control any flyaways. This step is crucial to maintain the classic style throughout your wedding day.
Step 4: Add the Mantilla Veil
Place the mantilla veil over your head, securing it with hairpins to ensure it stays in position. The mantilla veil typically frames your face and falls gracefully over your shoulders, adding a touch of elegance to your look.
Step 5: Personalize with Accessories (Optional)
If you want to enhance your classic look, consider adding decorative hairpins, fresh flowers, or bridal combs to your hairstyle. These accessories can complement the mantilla veil and long flowing hair beautifully.
With your mantilla veil and long flowing hair, you’ll exude timeless beauty on your wedding day. This sophisticated hairstyle beautifully complements your bridal attire and adds a touch of refinement to your overall look. Enjoy every moment, knowing that you are a vision of grace and elegance on your special day.
Conclusion
In 2023, bridal beauty is all about elegance, versatility, and personal style. Our tutorial on easy and stunning bridal hairstyles for the year has showcased a diverse range of options, from classic updos with tiaras to bohemian waves with floral crowns. These styles cater to the modern bride’s desire for timeless and unique looks.
Whether you’re seeking a romantic, vintage, or contemporary appearance, there’s a hairstyle that can enhance your bridal charm. We encourage you to explore these tutorials, experiment with different styles, and make your wedding day truly special.
Your beauty should reflect your personality, and with these easy-to-follow guides, you can elevate your bridal beauty with confidence and creativity. Let your hair be the canvas that expresses your unique essence on this momentous day.
FAQ
What are the essential steps in creating a bridal hairstyle?
Essential steps typically include washing and conditioning hair, blow-drying or styling as needed, and then creating the chosen hairstyle, which can involve curling, braiding, or updos.
How do I choose the right bridal hairstyle?
The right bridal hairstyle should complement your wedding dress, face shape, and personal style. It’s a good idea to consult with a hairstylist for recommendations based on your preferences.
Should I do a trial run for my bridal hairstyle?
Yes, it’s highly recommended to have a trial run with your hairstylist to ensure that the chosen hairstyle works well for you and can be adjusted if needed.
What accessories can be added to bridal hairstyles?
Bridal hairstyles can be enhanced with accessories like veils, tiaras, hairpins, flowers, or decorative combs, depending on your style and theme.
How should I prepare my hair for the wedding day?
It’s crucial to have clean and well-moisturized hair. Discuss a suitable hair care routine with your stylist in the weeks leading up to your wedding.
What if my hair is too short for the desired bridal hairstyle?
Hair extensions are an option if you desire a longer style. Consult with your stylist to see if this is feasible for your wedding look.
Should I get my hair colored before the wedding?
If you plan to change your hair color, do so well in advance of the wedding, allowing time for any adjustments or corrections if needed.
How do I ensure my bridal hairstyle stays in place throughout the day?
Use hair products like hairspray and bobby pins to secure your hairstyle. Your hairstylist can offer recommendations for products that suit your hair type.
When should I schedule my bridal hairstyle appointment on the wedding day?
Consult with your hairstylist to determine the best timing for your hairstyle appointment, keeping in mind your ceremony and photography schedule.
Can I DIY my bridal hairstyle using online tutorials?
While some brides choose to do their own hair, professional hairstylists are experts in creating long-lasting, beautiful bridal hairstyles. Consider your skill level and comfort with DIY versus seeking professional help.