
Cleaning the ears on a regular basis is pivotal part of our hygiene; however, a lot of people tend to forget this part, which usually results in clogged earwax and other ear-related issues. Though the most common item for ear cleaning is a Q-tip, according to newest findings, they are not the safest and most effective wax removal method. Instead, you should try this potent natural remedy.
Effective Home Remedies for Ear Wax Cleaning
1- Clean Ears With Hydrogen Peroxide
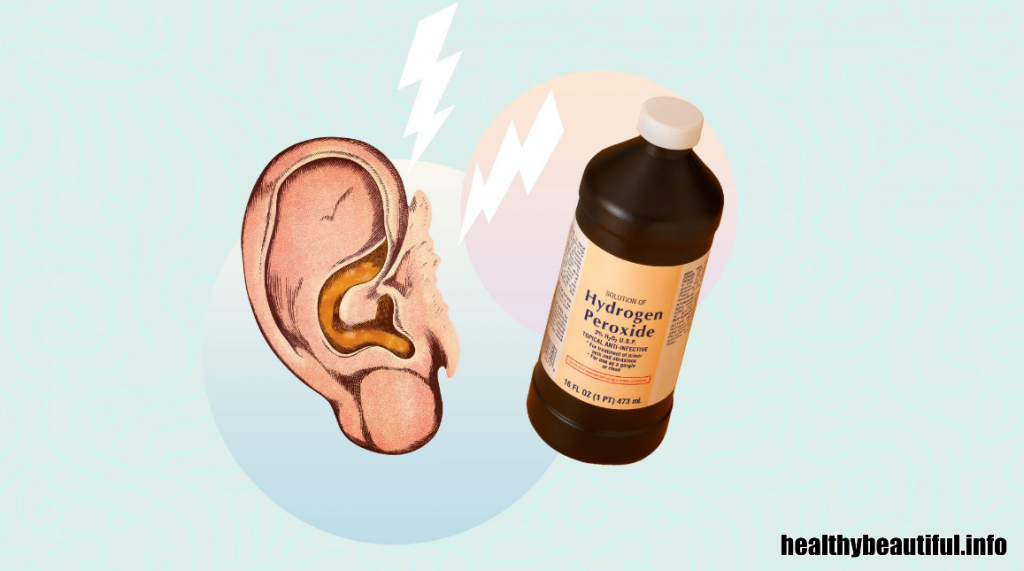
What You’ll Need:
- A dependable bottle of 3% hydrogen peroxide (easily found at most drugstores)
- Your chosen tool, like a dropper or a small, clean syringe
- A soft, comforting towel or cloth
The Steps:
- Create a Soothing Solution: Imagine you’re making a cup of tea, just the way you like it. In a clean container, mix equal parts of warm, filtered water and 3% hydrogen peroxide. This creates a gentle, soothing solution to pamper your ears, much like brewing a cup of tea to soothe your soul.
- Set the Scene: Find a cozy spot where you can truly relax. Whether you’re lying down on your side with the ear to be cleaned facing up or sitting with a gentle tilt of your head, prepare a soft towel or cloth to cradle your ear with care.
- Ready Your Tool: Picture yourself preparing for an artistic endeavor, choosing the best brush for your masterpiece. Fill the dropper or syringe with the diluted hydrogen peroxide solution, as if you’re setting the stage for a personal performance.
- The Art of Application: With all the delicacy of a painter applying the final brushstroke, gently pull your earlobe down and back. This action straightens your ear canal. Then, use the dropper or syringe to apply a few drops of the diluted hydrogen peroxide into your ear. It’s like a gentle touch, akin to applying your favorite perfume.
- Enjoy the Moment: Keep your head gently tilted, savoring a moment of tranquility, as if you’re taking a deep breath to embrace the serenity. This allows the solution to work its magic, like a quiet conversation between old friends. You might even hear a reassuring, subtle fizzing sound, like sharing a secret with someone close.
- Let It Flow: After a few serene minutes, tilt your head again to let the solution and softened earwax flow onto the towel or cloth. It’s like the graceful conclusion of a beautiful melody, where all the notes come together harmoniously.
- Repeat If Needed: If you feel that there’s still some earwax lingering, you can repeat the process as many times as required to ensure your ears feel refreshed and clear, similar to refining a cherished recipe until it’s just right.
Always remember to use the proper dilution (3% hydrogen peroxide) and never apply undiluted hydrogen peroxide directly into your ear to prevent discomfort. If you experience any uneasiness, pain, or have concerns about your ears, it’s like reaching out to a dear friend for advice; consult a healthcare professional who can provide the care and guidance you need.
2- Clean Ears With Coconut Oil
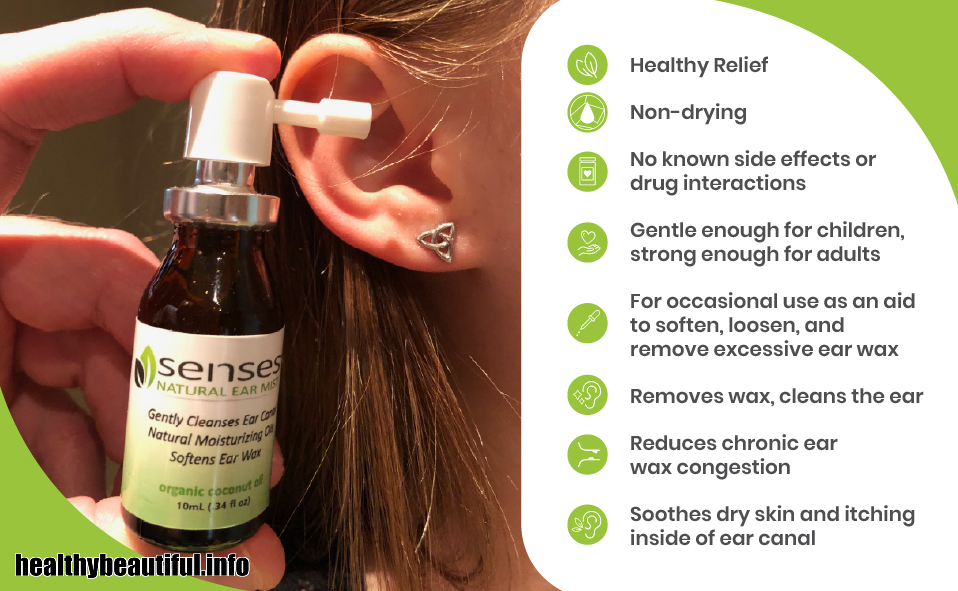
What You’ll Need:
- A jar of virgin, unrefined coconut oil (like a little jar of magic)
- A soft, cozy towel or cloth (your trusty sidekick)
- Warm water (if you prefer)
The Steps:
- Warm the Coconut Oil: Your coconut oil, in its natural form, is like a solid embrace. To make it more pliable, you can warm it up by gently heating a small amount until it becomes a comforting, liquid friend. You’re making it easier to work with, much like preparing a warm blanket for a cold night.
- Find Your Comfort Zone: Choose a cozy spot where you can truly unwind. Whether you’re lying down on your side with the ear to be cleaned facing up, or sitting upright with a slight tilt of your head, make sure your soft towel or cloth is ready to cradle your ear in its gentle support.
- Apply Coconut Oil: Like an artist applying their favorite paint to a canvas, use a clean dropper or your finger to add a few drops of the melted coconut oil into your ear. It’s a delicate, caring touch, like a gentle massage for your ear, warming and comforting.
- Embrace the Moment: Stay in your cozy position for about 5-10 minutes. During this time, the coconut oil works its magic, like a friend comforting you with their presence. You might want to use this time for a moment of peace and relaxation, perhaps listening to your favorite calming music.
- Release and Clean: After a few serene minutes, it’s time to sit up and let your ear, along with the softened earwax, express itself onto the towel or cloth. Just as you’d pat a friend on the back, you can gently wipe the outer ear to ensure it’s clean and refreshed. If you prefer, you can clean your ear further with warm water, using a bulb syringe to help wash away the softened earwax.
- Repeat as Needed: Feel free to repeat this process as many times as required until your ears feel refreshed and ready for whatever adventures the day holds.
Coconut oil is known for its soothing and moisturizing properties, like a warm hug for your ears. If you ever experience any discomfort or if you have concerns about your ears, it’s a bit like confiding in a caring friend; consult a healthcare professional for guidance and assistance to ensure your ears are well taken care of.
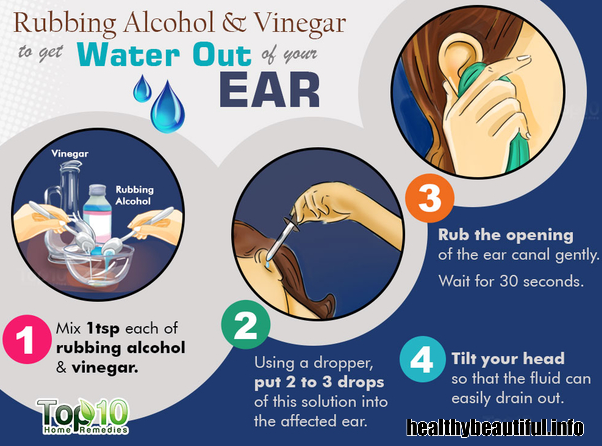
3- Clean Ears With White Vinegar and Rubbing Alcohol Solution
What You’ll Need:
- White vinegar (like a trusted old friend)
- Rubbing alcohol (isopropyl alcohol, your dependable sidekick)
- A clean dropper or a small, clean syringe (your tools for the job)
- A soft, comforting towel or cloth (your loyal assistant)
- Warm water (if you prefer, as a refreshing addition)
The Steps:
- Prepare the Solution: It’s like mixing up a home remedy, similar to crafting a special drink. Combine equal parts of white vinegar and rubbing alcohol in a clean container. This creates your secret potion to keep your ears feeling fresh and clear.
- Set the Scene: Find a cozy spot where you can truly relax. Whether you’re lying down on your side with the ear you want to clean facing up, or sitting up with a gentle tilt of your head, make sure your soft towel or cloth is ready to offer its gentle support.
- Apply the Solution: Much like a chef adding the perfect seasoning to a dish, use a clean dropper or a syringe to add a few drops of the white vinegar and rubbing alcohol solution into your ear. It’s like a cool breeze on a warm day, offering a refreshing sensation.
- Embrace the Moment: Stay in your comfortable position for about 5-10 minutes, allowing the solution to work its magic. This is your time to unwind and relax, like enjoying the calming sounds of nature.
- Release and Clean: After a few peaceful minutes, sit up and tilt your head, allowing the solution and any softened earwax to flow out onto the towel or cloth. It’s like the final act of a symphony, where all the instruments come together harmoniously. You can also gently wipe the outer ear to ensure it’s clean and comfortable. If you prefer, you can use warm water as if you’re rinsing your face to make sure you feel refreshed.
- Repeat as Needed: Feel free to repeat this process whenever necessary to keep your ears feeling refreshed and clear, much like taking a refreshing sip of water on a hot day.
This method combines the gentle cleaning properties of white vinegar with the disinfecting qualities of rubbing alcohol, much like a trusted duo working together. If you ever experience any discomfort or have concerns about your ears, it’s like seeking advice from a trusted friend; consult a healthcare professional for guidance and assistance to ensure your ears are well taken care of.
4- Clean Ears With Baby Oil
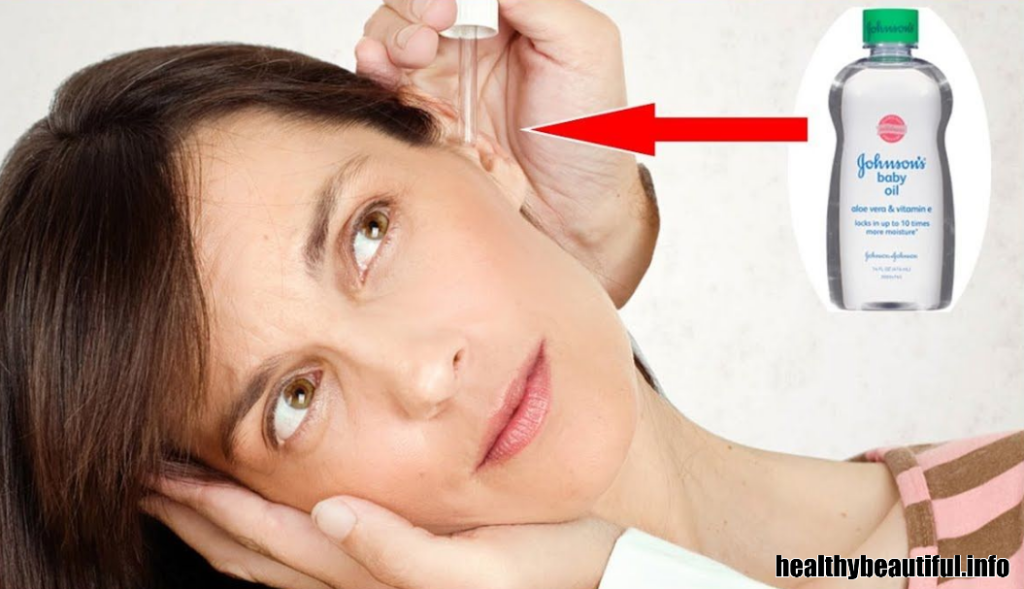
What You’ll Need:
- A comforting bottle of baby oil (a bit like your trusted skincare product)
- A clean dropper or a small, clean syringe (your dependable helpers)
- A soft, cozy towel or cloth (your faithful companion)
- Warm water (if you prefer, like an extra touch of relaxation)
The Steps:
- Prepare for Self-Care: It’s a bit like setting the scene for your own special self-care ritual. Have your bottle of baby oil ready, much like you prepare your favorite products for a pampering session.
- Create a Relaxing Space: Find a cozy, soothing spot for your ear-cleaning journey. Whether you’re lying down on your side with the ear you want to clean facing up or sitting with a gentle tilt of your head, placing a soft towel or cloth beneath your ear is like arranging a warm, inviting nest.
- Indulge in Warmth: For an extra touch of luxury, you can warm the baby oil by placing the bottle in a bowl of warm water for a few minutes. This is akin to preparing a comforting, warm bath for yourself, creating an atmosphere of relaxation.
- A Gentle Touch: Like a gentle touch from a caring friend, use a clean dropper or a syringe to add a few drops of warm baby oil into your ear. Take care not to insert it too deeply into the ear canal. The baby oil provides a comforting and nurturing sensation, much like a friendly embrace.
- Moments of Tranquility: Stay in your comfortable position for about 5-10 minutes, allowing the baby oil to work its soothing magic. This is your special time for relaxation and self-care, similar to savoring a moment of peace and self-indulgence.
- Releasing and Refreshing: After a few serene minutes, sit up and tilt your head to let the baby oil and softened earwax flow out onto the towel or cloth. You can also gently wipe the outer ear to ensure it’s clean and comfortable, much like freshening up after a rejuvenating spa experience. If you prefer, you can use warm water as if you’re rinsing away the worries of the day.
- Personalized Self-Care: Feel free to repeat this process whenever needed to keep your ears feeling fresh and clear, much like making time for your favorite self-care rituals to rejuvenate your body and soul.
Baby oil is known for its gentle and moisturizing properties, much like a caring friend who looks out for your well-being. If you ever experience any discomfort or have concerns about your ears, it’s like reaching out to a trusted friend for advice; consult a healthcare professional for guidance and assistance to ensure your ears receive the care they deserve.
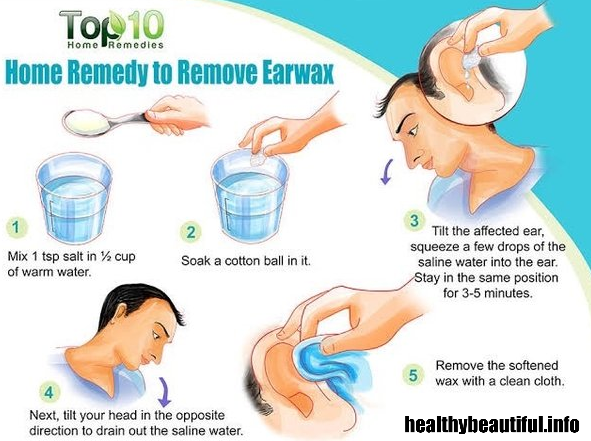
5- Clean Ears With Saline Water
What You’ll Need:
- Warm, clean water (a bit like a warm cup of tea)
- Table salt (like a trusted ingredient for a home remedy)
- A clean dropper or a small, clean syringe (your helpful tools)
- A soft, comforting towel or cloth (your trusty companion)
The Steps:
- Prepare the Saline Solution: Think of it as crafting your own healing potion, much like brewing your favorite tea. Start by mixing a teaspoon of table salt into about half a cup of warm, clean water. Stir until the salt dissolves completely, creating a gentle saline solution.
- Find Your Comfort Zone: Choose a cozy spot for your earwax removal journey. Whether you’re lying down on your side with the ear you want to clean facing up, or sitting with a gentle tilt of your head, having a soft towel or cloth under your ear is like setting up a warm, welcoming space.
- Load the Dropper or Syringe: It’s as if you’re preparing a special home remedy. Fill a clean dropper or syringe with the warm saline solution, getting ready to offer your ear some soothing care.
- A Gentle Touch: Much like adding drops of a healing elixir to soothe an ailment, carefully place a few drops of the warm saline solution into your ear. Be cautious not to insert it too deeply into the ear canal. The solution provides a comforting and calming sensation, similar to applying a warm compress to a sore muscle.
- Moments of Tranquility: Stay in your comfortable position for a few minutes, allowing the saline solution to work its magic. This is your time to relax, similar to finding a quiet moment to unwind.
- Release and Clean: After a little while, sit up and tilt your head to allow the saline water and softened earwax to flow out onto the towel or cloth. You can also gently wipe the outer ear to ensure it’s clean and dry. If you prefer, you can clean your ear further with warm water, using a bulb syringe to help wash away any loosened earwax.
- Personalized Care: You can repeat this process whenever necessary to keep your ears feeling clean and refreshed, much like taking a warm bath to relax and rejuvenate.
Saline water is a gentle and natural way to show your ears some love, just like taking care of a cherished part of your body. If you ever experience any discomfort or have concerns about your ears, it’s like reaching out to a trusted friend for advice; consult a healthcare professional for guidance and assistance to ensure your ears receive the care they deserve.
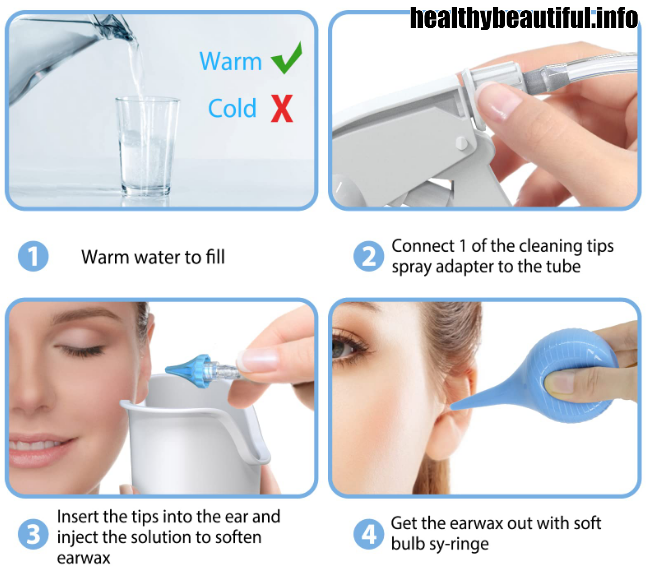
6- Clean Ears With Warm Water Rinse
What You’ll Need:
- Warm, clean water (akin to drawing a comforting bath)
- A clean bulb syringe or a specialized earwax removal kit (your gentle helpers)
- A soft, cozy towel or cloth (your loyal companion)
The Steps:
- Prepare Your Bathwater: Imagine you’re creating the perfect bath. Use warm, clean water, just the way you like it, like finding that sweet spot for a relaxing soak. Test it on the inside of your wrist to make sure it’s as soothing as you prefer.
- Set the Scene: Find a comfortable place for your earwax removal session. Whether you’re standing with your head tilted to the side or sitting down with a gentle tilt, laying a soft towel or cloth under your ear is like creating your personal spa retreat.
- Get Your Trusty Showerhead Ready: It’s like preparing your showerhead for a luxurious shower. Load your bulb syringe or specialized earwax removal kit, getting ready for a pampering experience.
- Treat Your Ear: Gently insert the tip of the syringe or kit into your ear canal, much like stepping into a warm, invigorating shower. Be careful not to go too deep. As you squeeze the bulb or use the kit following the manufacturer’s instructions, think of it as giving your ear a spa treatment. The warm water flows in, like a stream of relaxation, to help soften and wash away the earwax.
- Savor the Experience: Let the water linger in your ear for a brief moment, like immersing yourself in a luxurious bath. The warm water works its magic, like the soothing touch of a spa therapist, gently softening the earwax.
- Embrace the Freshness: After a minute or so, tilt your head to allow the water and softened earwax to flow out onto the towel or cloth, just like stepping out of your bath. You can also pamper your outer ear with a gentle wipe to ensure it’s clean and dry, as if wrapping yourself in a soft, fluffy robe.
- Customized Self-Care: You can repeat this process as needed until your ear feels clear and refreshed, much like incorporating a spa day into your routine, tailored to your needs.
Remember to be gentle throughout, as if you’re treating yourself to a spa day, ensuring you don’t push the earwax deeper into the ear canal. If you experience any discomfort or if the earwax persists, it’s a bit like consulting a healthcare professional for guidance and assistance, just as you’d turn to a trusted friend for advice and support when needed.
7- Clean Ears With Drops

What You’ll Need:
- Over-the-counter earwax removal drops (your trusted skincare secret)
- A clean dropper (your precision instrument for self-care)
- A soft, comforting towel or cloth (your reliable partner in this intimate journey)
The Steps:
- Choose Your Special Skincare Formula: Just like selecting your cherished skincare products, head to your local pharmacy and bring home those over-the-counter earwax removal drops. These are like your well-kept skincare secrets, handpicked to keep your ears feeling clear and content.
- Create a Sanctuary for Self-Care: Find a cozy and tranquil spot for your earwax removal session, as if you’re setting the stage for a soothing self-care ritual. Lay out a soft towel or cloth to catch any excess liquid, much like preparing your favorite robe for post-treatment relaxation.
- Unveil Your Personal Skincare Guide: Take a moment to read the instructions on the earwax removal drop package with care, as if you’re exploring the steps of a tailored skincare routine, designed exclusively for you.
- Indulge Your Ears: Gently tilt your head to the side, as if you’re settling in for a lavish spa treatment. With a clean dropper, apply the recommended number of drops into your ear, like pampering your skin with a luxurious serum or lotion, offering your ears the finest attention.
- Savor the Ritual: Stay in the same position for the specified time mentioned in the instructions, relishing the soothing effects like you would during a cherished spa treatment. Allow the drops to work their magic, as if a skilled spa therapist is tending to your ears, caressing and tenderly softening the earwax.
- Embrace the Moment: After the recommended time, sit up and tilt your head to the side, allowing the drops and any softened earwax to flow out onto the towel or cloth. Gently wipe your outer ear to ensure it’s clean and dry, as if you’re enveloping yourself in a warm, plush robe after a spa session.
- Honor Your Self-Care Routine: You can repeat this process as often as recommended on the package until your ear feels clear and comfortable, much like you follow your daily skincare regimen for a radiant, happy complexion.
Earwax removal drops are like a sacred skincare ritual for your ears, ensuring they receive the attention and care they deserve. If you ever experience any discomfort or if the earwax persists, it’s akin to reaching out to your most trusted skincare guru when you have skin concerns; consider consulting a healthcare professional for guidance and assistance to keep your ears in top condition.
8- Clean Ears With Olive Oil

What You’ll Need:
- Extra virgin olive oil (your all-natural skincare remedy, like an old family secret)
- A clean dropper (your trusted tool for self-care, just like your favorite makeup brush)
- A soft towel or cloth (your loyal companion, like a cozy blanket on a chilly day)
The Steps:
- Gather Your Beloved Essentials: Much like gathering your cherished skincare products, get your extra virgin olive oil, a clean dropper, and a soft towel or cloth. Think of it as preparing for a special self-care ritual for your ears, a bit like an intimate spa day at home.
- Craft a Comforting Space: Find a quiet and tranquil spot for your ear cleaning session, similar to creating your very own oasis for self-care. Lay down the soft towel or cloth, as if you’re making a cozy nook for yourself.
- Prepare Your Application “Brush”: Just as you would apply your favorite skincare product, load the dropper with extra virgin olive oil. This dropper is your precise and caring tool for this unique ear care journey, much like using your favorite makeup brush to achieve a flawless look.
- Lean Back and Unwind: Tilt your head to the side, with the ear you want to pamper facing up, as if you’re settling into a luxurious spa chair for a facial treatment. Using the dropper, apply a few drops of extra virgin olive oil into your ear with love and care, similar to how you’d apply a cherished serum to your skin.
- Embrace the Bliss: Stay in this position for a few minutes, allowing the olive oil to work its magic, much like savoring the serenity of a spa day. The oil acts as a gentle spa therapist, delicately softening and breaking down the earwax, as if it’s using a gentle touch to soothe your skin.
- Nurture and Refresh: After a brief pause, sit up and tilt your head to let the olive oil and any softened earwax flow out onto the towel or cloth. You can also pamper your outer ear with a gentle wipe to ensure it’s clean and dry, like wrapping yourself in a warm, comforting blanket after a spa treatment.
- Revel in the Self-Care: You can repeat this process as often as needed until your ear feels clear and content, much like following your daily skincare routine for a fresh and radiant complexion.
Cleaning your ears with olive oil is a natural and nurturing way to care for them, ensuring they stay clean and healthy. If you experience any discomfort or if the earwax persists, it’s like reaching out to your trusted skincare expert when you have skin concerns; consider consulting a healthcare professional for guidance and assistance to keep your ears in the best possible condition.
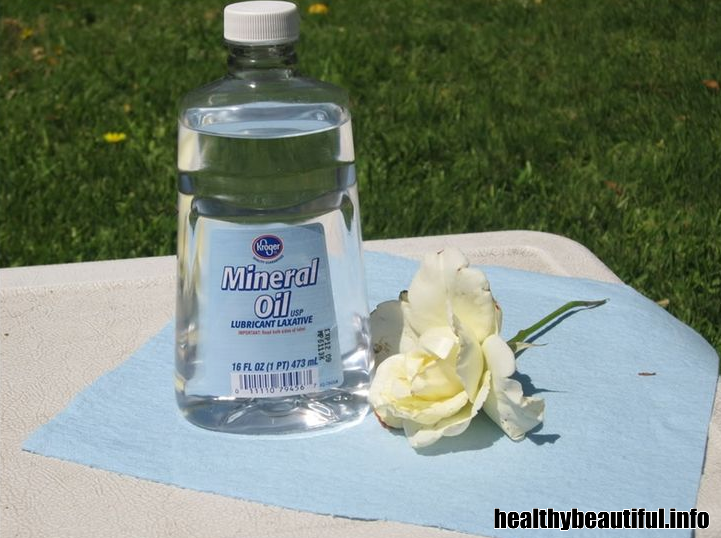
9- Clean Ears With Mineral Oil
What You’ll Need:
- Mineral oil (your gentle and dependable ear care companion)
- A clean dropper (your precise tool for self-care)
- A soft towel or cloth (your comforting friend on this nurturing journey)
The Steps:
- Collect Your Trusted Allies: Think of this like preparing for a comforting skincare routine. Gather your mineral oil, a clean dropper, and a soft towel or cloth. It’s as if you’re setting the stage for a serene spa experience right at home, but this time, it’s all about your ears.
- Craft Your Peaceful Oasis: Find a cozy and quiet corner for your ear cleaning session, just like creating your own tranquil retreat for self-care. Lay the soft towel or cloth down, turning it into a warm, inviting space.
- Your Precision Instrument: Much like using your favorite makeup brush to achieve a flawless look, fill the dropper with mineral oil. This is your trusty and precise tool for this unique ear care journey.
- Settle in and Unwind: Tilt your head to the side, with the ear you want to pamper facing up. It’s as if you’re reclining in a plush spa chair, ready for a soothing facial treatment. Using the dropper, apply a few drops of mineral oil into your ear, as if you’re giving your skin a nourishing, loving treatment.
- Savor the Serenity: Stay in this position for a few minutes, allowing the mineral oil to work its magic. This is your moment of tranquility, much like basking in the peace of a spa day. The oil acts like a gentle spa therapist, using a tender touch to softly soften and break down the earwax, just as a skilled therapist would treat your skin.
- Refresh and Cleanse: After a brief pause, sit up and tilt your head to let the mineral oil and any softened earwax flow out onto the towel or cloth. It’s like wrapping yourself in a cozy, warm robe after your spa treatment. You can also pamper your outer ear with a gentle wipe to ensure it’s clean and dry.
- Repeat as Needed: You can repeat this process as often as necessary until your ear feels clear and content, much like following your daily skincare routine for a fresh and radiant complexion.
Cleaning your ears with mineral oil is a gentle and nurturing way to care for them, ensuring they stay clean and healthy. If you experience any discomfort or if the earwax persists, think of it as reaching out to your trusted skincare expert when you have skin concerns; consider consulting a healthcare professional for guidance and assistance to keep your ears in the best possible condition.
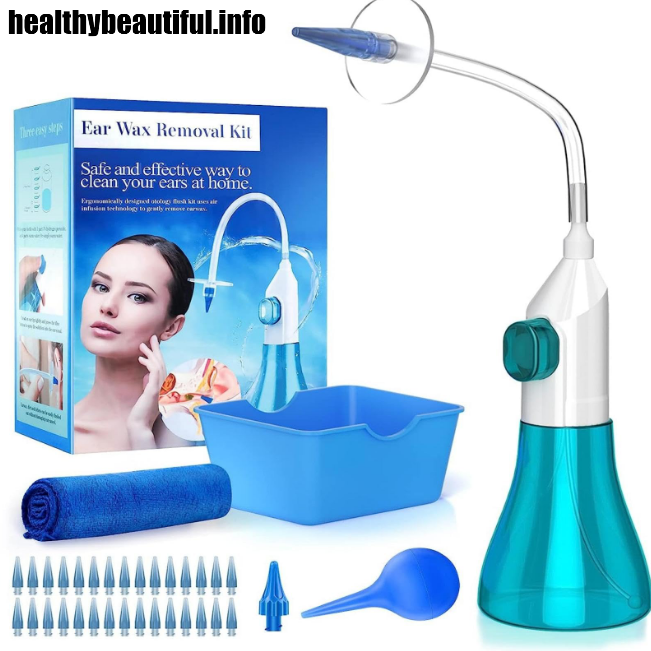
10- Clean Ears With Earwax Removal Kits
What You’ll Need:
- An earwax removal kit (your reliable partner in ear care)
- A clean, soft cloth or towel (your comforting and dependable companion)
- A quiet and well-lit space (your cozy haven for this personal journey)
The Steps:
- Unveil Your Ear Care Assistant: It’s like unwrapping a thoughtful gift when you open your earwax removal kit. Take a moment to explore its contents, much like discovering the tools for a DIY project. This kit is your trusted friend in your ear care endeavor.
- Create a Serene Sanctuary: Find a tranquil, well-lit area where you can relax and focus, much like preparing your own workshop for a beloved DIY project. Lay down a soft cloth or towel, turning it into a comforting surface for your ear care experience.
- Connect with Your Guide: Similar to poring over a detailed recipe for a special meal, carefully read and follow the instructions provided in your earwax removal kit. These instructions are your guiding star, leading you through this intimate ear care journey.
- Let the Magic Begin: Use the softening solution as directed in the manual. This is your “marinating” step, where you allow the solution to work its gentle magic, similar to marinating ingredients for a culinary masterpiece.
- Handle with Care: After the designated time, use the tools included in the kit to gently remove softened earwax. Treat this step as if you’re crafting a delicate piece of art, requiring precision and tenderness, much like creating something beautiful with your own hands.
- Tidy Up and Admire Your Work: Once you’ve successfully removed the earwax, use a clean cloth or towel to gently clean the outer ear. It’s like tidying up your workspace after completing a satisfying DIY project, admiring the results of your craftsmanship.
- If Necessary, Embark on the Journey Again: You can repeat the process if needed, much like returning to your beloved project when there’s more to be done. Always consult the kit’s instructions to ensure you’re following the right path.
Earwax removal kits are your personal DIY project for ear care, offering you the means to maintain clean and comfortable ears. If you face any challenges or discomfort along the way, it’s like seeking advice from a trusted friend when you’re on a personal project. Consider consulting a healthcare professional for guidance and assistance to ensure your ears remain in their best condition.
11- Clean Ears With Warm Compress
What You’ll Need:
- A clean, soft cloth (your comforting and familiar blanket)
- Warm water (your go-to remedy for relaxation)
- A quiet and cozy space (your own little sanctuary)
The Steps:
- Set the Scene for Comfort: Find a comfy and peaceful spot where you can sit or lie down, much like creating your ideal reading nook. Make sure your soft cloth is nearby.
- Prep Your Cozy Blanket: Soak the cloth in warm water, ensuring it’s just the right temperature, like testing your bathwater for comfort. Gently wring out any excess water to keep it comfortably damp.
- Get Comfy and Cozy: Position yourself in a way that allows you to tilt your head, making it as relaxing as curling up in your favorite armchair with a good book.
- Wrap Yourself in Warmth: Place the warm, damp cloth over your ear, covering it completely, just like snuggling under your favorite cozy blanket on a chilly night. Let the soothing warmth embrace your ear for about 20 minutes.
- Savor the Serenity: During this time, take a deep breath and enjoy the comforting warmth, much like savoring the moment when you find a perfect spot to relax with your favorite book. The warmth is like a gentle, reassuring hug, softening the earwax with care.
- Let Nature Work Its Magic: After the 20 minutes have passed, remove the warm cloth. You can gently tilt your head to let any softened earwax drain out naturally, as if you’re allowing your thoughts to flow during a moment of mindfulness.
- Freshen Up: Wipe the outer ear with a clean, dry cloth, much like patting your skin dry after a warm shower. This step ensures the area remains clean and dry, just like the post-shower feeling of wrapping yourself in a soft, fluffy towel.
- Treat Yourself to More Comfort: You can repeat this process as needed until your ear feels clear and content, much like revisiting your favorite self-care routine for that extra touch of well-being.
Cleaning your ears with a warm compress is like treating yourself to a spa day for your ears, making sure they stay clean and cozy. If you experience any discomfort or if the earwax persists, think of it as seeking advice from a trusted friend when you have self-care questions. Consider consulting a healthcare professional for guidance and assistance to ensure your ears remain in their best condition.
12- Clean Ears With Gravity Drainage
What You’ll Need:
- Warm water (your gentle and nurturing element)
- A clean bowl or container (your trusty partner in this natural ritual)
- A towel (your cozy companion)
- A quiet and relaxed space (your sanctuary for self-care)
The Steps:
- Find Your Peaceful Corner: Seek out a serene and cozy place where you can sit or recline, similar to preparing for a moment of tranquility. Have your clean bowl or container ready, just like arranging your favorite items for a cherished ritual.
- Prepare the Warm Water: Use warm water, not too hot, similar to filling your bathtub with the perfect temperature for a soothing bath. Test the water to ensure it’s comforting and safe.
- Get Comfortable: Tilt your head to the side, like settling into a cozy position for relaxation, with the ear you want to pamper facing downward.
- Create Your Ear Spa: Position the clean bowl or container beneath your ear, much like setting up your own spa experience in the comfort of your home.
- Let Nature Take Over: Gently pour the warm water into your ear, allowing it to fill the ear canal, much like letting a gentle stream flow through a natural scene. The water will softly embrace your ear, working with gravity to encourage earwax to loosen.
- Stay in the Moment: Remain in this peaceful position for a few minutes, as if you’re taking a moment to appreciate the calm beauty of a natural landscape. Let the warmth and gravity work their magic to soften and encourage earwax to flow out.
- Drain and Freshen Up: After a few minutes, sit up, allowing the water and any softened earwax to drain out into the bowl or container, similar to the gentle flow of a stream. Gently wipe the outer ear with a towel to ensure it’s clean and dry, just as you would towel off after a refreshing swim.
- Enjoy Nature’s Touch: You can repeat this process as needed until your ear feels clear and content, much like revisiting your favorite natural spot for relaxation.
Cleaning your ears with gravity drainage is like connecting with the soothing beauty of nature to ensure your ears stay clean and healthy. If you experience any discomfort or if the earwax persists, it’s akin to seeking advice from a knowledgeable friend when you have a natural concern. Consider consulting a healthcare professional for guidance and assistance to ensure your ears remain in their best condition.
Conclusion
In 2023, conquering ear wax and defending against infections is easier than ever with a range of proactive strategies. From the gentle care of warm compresses to the convenience of earwax removal kits, there are numerous tools at your disposal to keep your ears clean and healthy. It’s crucial to remember that ear health is a vital aspect of overall well-being. By staying informed and taking advantage of these strategies, you can ensure your ears remain trouble-free. We encourage you to share your experiences, tips, and questions, as your engagement with the community can further enhance the knowledge and solutions available to all. Together, let’s make 2023 a year of triumph over ear wax and infections!
FAQ
Why is ear wax management important?
Ear wax, or cerumen, plays a crucial role in protecting the ear canal. However, excessive wax buildup can lead to various issues, including hearing loss and infections. Proactive management helps maintain ear health.
How can I prevent ear wax buildup?
Regularly cleaning the outer ear with a washcloth can help prevent excessive wax accumulation. Avoid using cotton swabs, as they can push wax deeper into the ear canal.
Are there any at-home remedies for ear wax removal?
Yes, using a mixture of warm water and hydrogen peroxide or over-the-counter ear drops can help soften ear wax. Tilt your head to the side to let the drops enter the ear, then drain them out.
What about ear irrigation kits? Are they safe to use at home?
Ear irrigation kits can be safe if used properly. Follow the instructions carefully, and if you experience pain or discomfort, consult a healthcare professional.
How can I prevent ear infections?
Maintain good ear hygiene, avoid inserting foreign objects into your ears, and keep ears dry. If you swim frequently, consider using earplugs to prevent water from entering the ear canal.
What are the signs of an ear infection?
Symptoms include ear pain, drainage from the ear, hearing loss, dizziness, and a feeling of fullness or congestion in the ear. If you experience these symptoms, seek medical attention.
Can I use ear candles to remove ear wax?
Ear candles are not recommended, as they can be ineffective and potentially dangerous. It’s better to consult with a healthcare professional for safe and effective methods.
Are there any dietary changes that can help prevent ear wax issues?
While no specific diet can prevent ear wax problems, staying hydrated is essential for overall health, including the health of your ears.
When should I see a doctor for ear wax or infection issues?
If you experience severe pain, sudden hearing loss, persistent drainage, or if at-home remedies are ineffective, it’s crucial to consult with a healthcare professional for proper diagnosis and treatment.
What advancements can we expect in ear care in 2023?
Advancements may include innovative ear cleaning devices, improved ear drops, and more personalized treatments. Stay informed through healthcare updates for the latest developments in ear care.