
Step into chic simplicity with our curated collection of Minimalist Nail Art Designs with Lines. Embracing clean lines and elegance, these 30 unique ideas redefine nail art with effortless appeal. Whether you prefer sleek sophistication or subtle accents, there’s a design to suit every minimalist aesthetic.
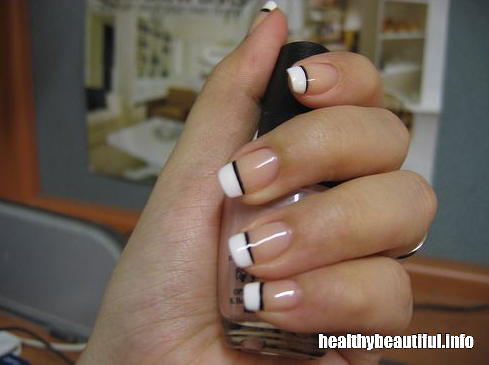
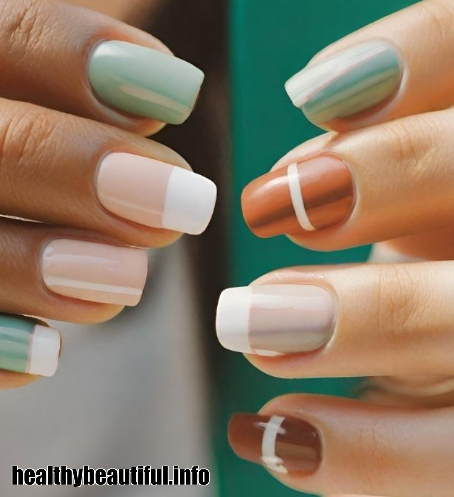
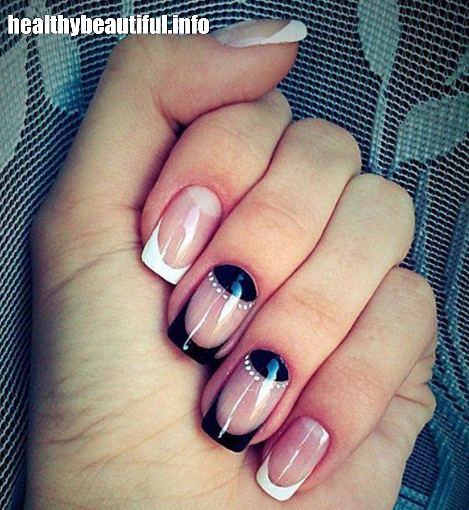
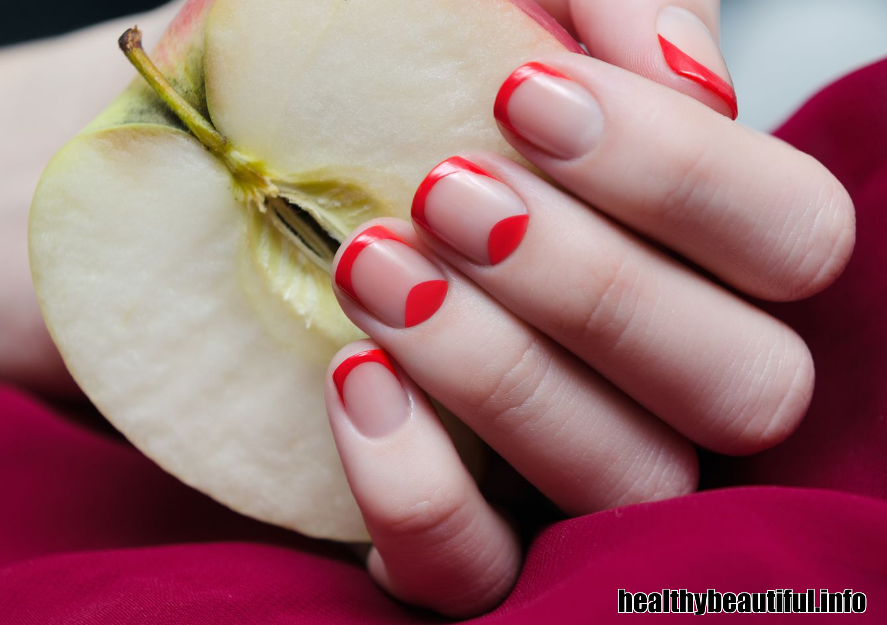
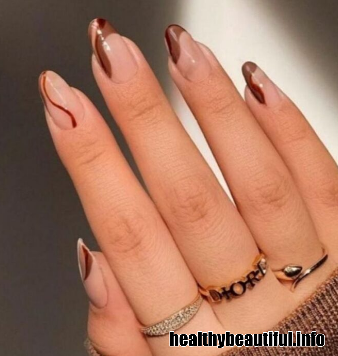
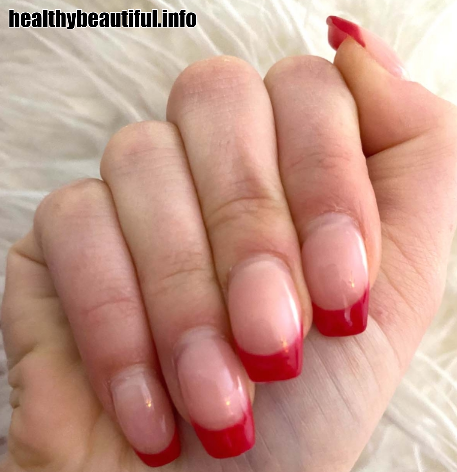
Classic French manicure with a thin black line along the tips
For a classic French manicure with a modern twist:
- Apply a clear base coat.
- Paint the tips of your nails white.
- Add a thin black line along the edges of the white tips.
- Seal with a clear top coat for a glossy finish.
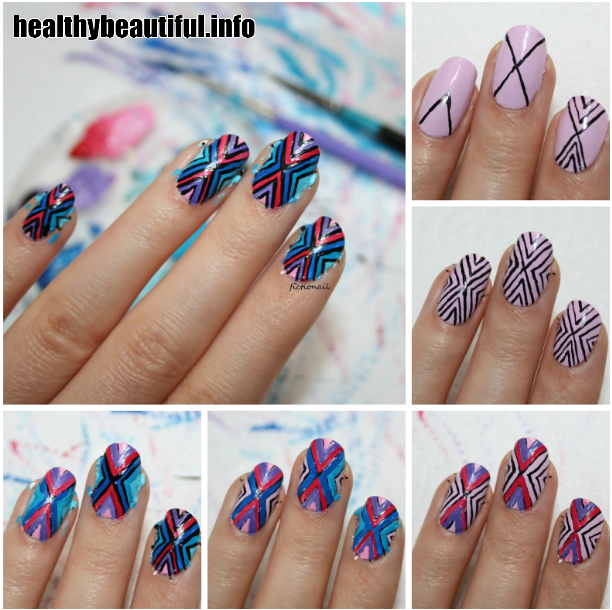
Geometric lines in various colors forming intricate patterns on each nail
To craft intricate patterns with geometric lines in various colors on each nail:
- Apply a clear base coat.
- Paint geometric lines in different colors on each nail.
- Create intricate patterns using the lines.
- Seal with a clear top coat for durability and shine.
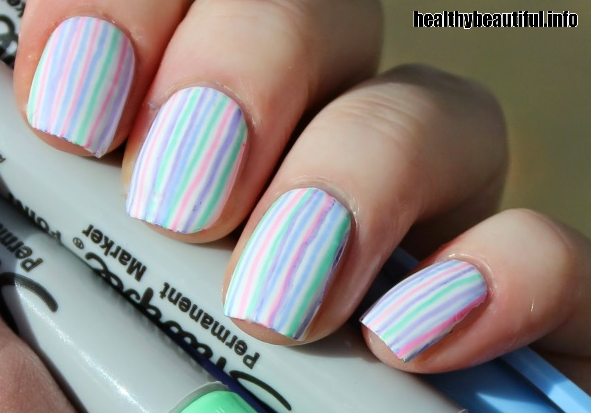
Minimalist vertical lines on a nude base for an elongating effect
To achieve an elongating effect with minimalist vertical lines on a nude base:
- Apply a nude base coat.
- Paint thin vertical lines on each nail.
- Ensure the lines are evenly spaced and straight.
- Seal with a clear top coat for a polished finish.
Thin diagonal lines intersecting across each nail for a modern look
For a modern look with thin diagonal lines intersecting across each nail:
- Apply a clear base coat.
- Paint thin diagonal lines across each nail, intersecting them.
- Ensure clean and precise intersections.
- Seal with a clear top coat for a polished finish.
Horizontal lines in alternating colors for a playful design
To create a playful design with horizontal lines in alternating colors:
- Apply a clear base coat.
- Paint horizontal lines across each nail in alternating colors.
- Ensure even spacing and straight lines.
- Seal with a clear top coat for a glossy finish.
Negative space nails with a single bold line across the center
To achieve negative space nails with a single bold line across the center:
- Apply a clear base coat.
- Leave a portion of your nails unpainted to create negative space.
- Paint a single bold line across the center of each nail.
- Seal with a clear top coat for durability and shine.
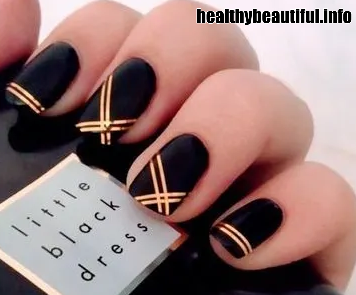
Metallic gold lines on a matte black base for a chic contrast
To create a chic contrast with metallic gold lines on a matte black base:
- Apply a matte black base coat.
- Paint thin metallic gold lines across each nail.
- Ensure even spacing and straight lines.
- Seal with a clear matte top coat to maintain the contrast.
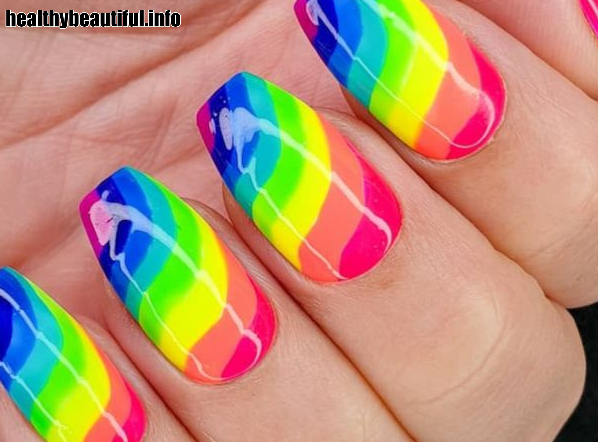
Thin, parallel lines in rainbow colors for a vibrant and fun manicure
For a vibrant and fun manicure with thin, parallel lines in rainbow colors:
- Apply a clear base coat.
- Paint thin, parallel lines in rainbow colors across each nail.
- Ensure even spacing between the lines.
- Seal with a clear top coat for a glossy finish.
Monochromatic nails with a single bold line of a contrasting color
To achieve monochromatic nails with a single bold line of a contrasting color:
- Apply a base coat in your chosen monochromatic color.
- Paint your nails entirely in this color.
- Once dry, add a single bold line using a contrasting color.
- Ensure the line is straight and centered for a striking effect.
- Seal with a clear top coat for a polished finish.

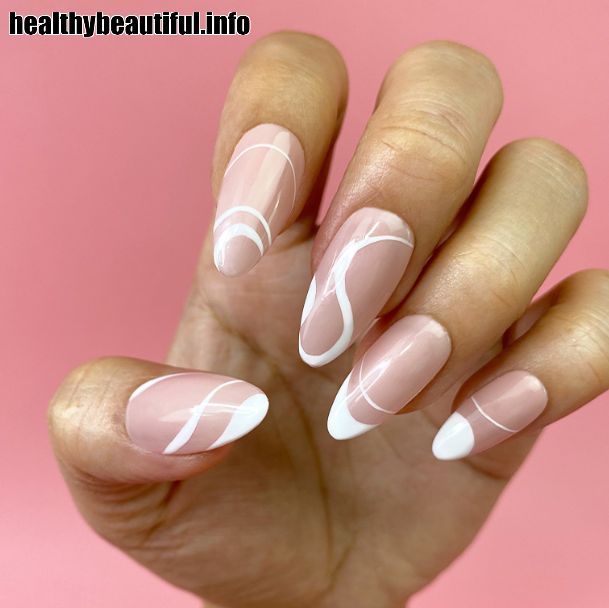
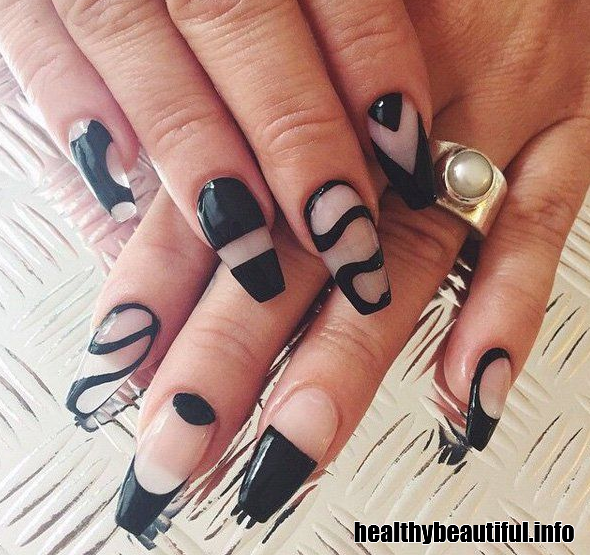
Abstract linear design with irregular lines crossing each other
To achieve an abstract linear design with irregular lines crossing each other:
- Apply a base coat.
- Create irregular lines crossing each other using different colors.
- Ensure the lines intersect in various directions for an abstract effect.
- Allow to dry completely.
- Seal with a clear top coat for longevity.
Negative space nails with a single delicate line near the cuticle

To achieve negative space nails with a delicate line near the cuticle:
- Apply a clear base coat.
- Leave a portion of your nails unpainted to create negative space.
- Paint a single delicate line near the cuticle in a contrasting color.
- Seal with a clear top coat for a polished finish.
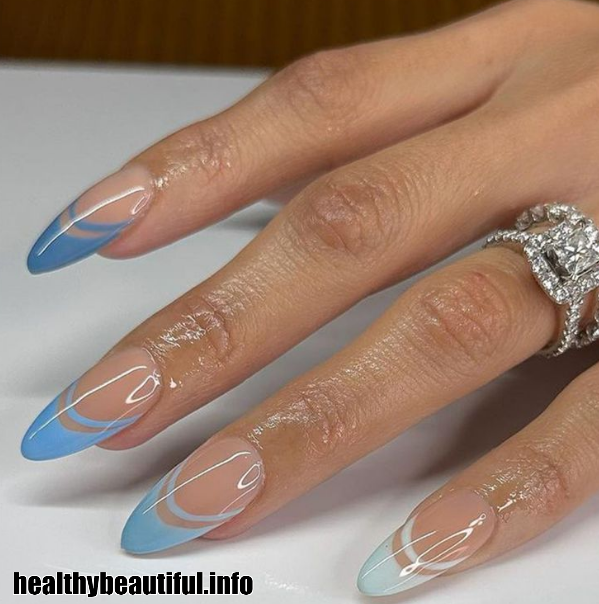
Vertical gradient lines transitioning from one color to another
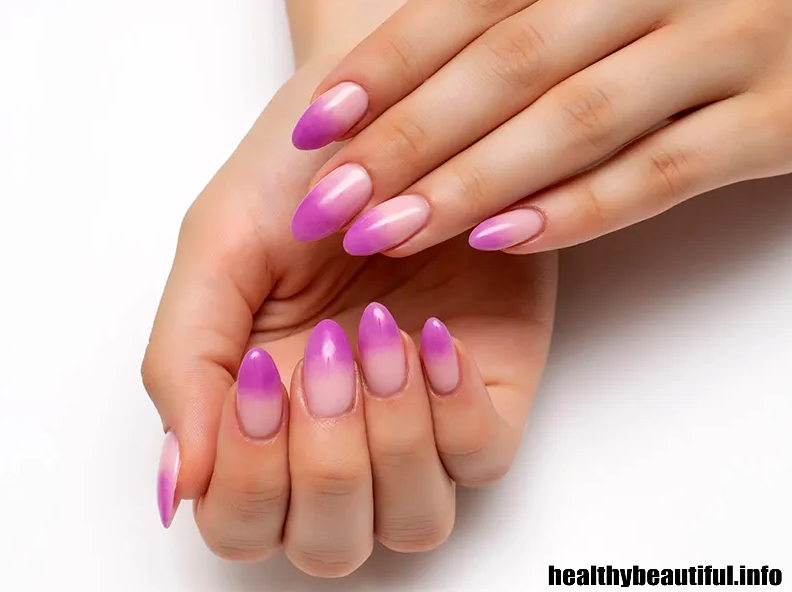
To create vertical gradient lines transitioning from one color to another:
- Apply a clear base coat.
- Choose two or more colors for your gradient.
- Paint thin vertical lines on each nail, alternating between the colors and blending them slightly where they meet.
- Gradually transition the colors from one end of the nail to the other.
- Seal with a clear top coat for a glossy finish.
Minimalist grid pattern created with thin black lines on a white base
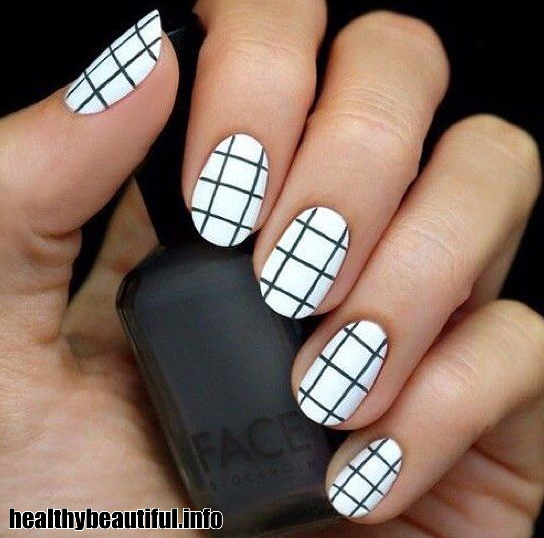
To achieve a minimalist grid pattern with thin black lines on a white base:
- Apply a white base coat.
- Using a fine brush or striping tape, create a grid pattern with thin black lines on each nail.
- Ensure even spacing and straight lines for a clean look.
- Seal with a clear top coat for a polished finish.
Half-moon nails with a thin line outlining the crescent shape
To create half-moon nails with a thin line outlining the crescent shape:
- Apply a clear base coat.
- Use hole reinforcement stickers or nail vinyls to create a crescent shape at the base of each nail.
- Paint the exposed area with your desired color.
- Once dry, carefully remove the stickers.
- Paint a thin line along the edge of the crescent shape, outlining it.
- Seal with a clear top coat for a glossy finish.
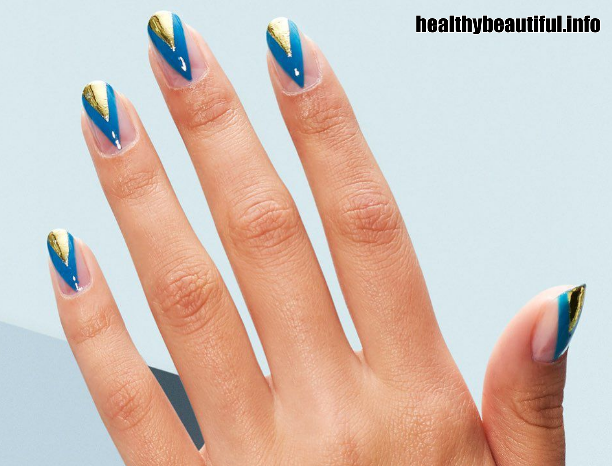
Chevron pattern created with diagonal lines for a dynamic look
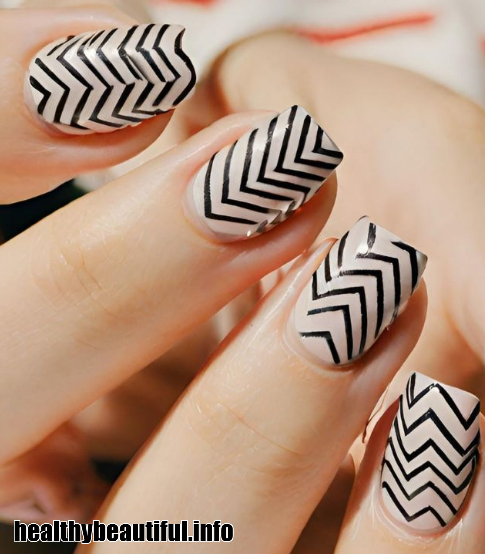
To create a chevron pattern with diagonal lines for a dynamic look:
- Apply a clear base coat.
- Use striping tape or nail vinyls to create diagonal lines in a chevron pattern on each nail.
- Fill in the exposed areas with your desired colors.
- Once dry, carefully remove the tape or vinyls.
- Seal with a clear top coat for a glossy finish.
Negative space nails with a single line framing the edge of each nail
To achieve negative space nails with a single line framing the edge of each nail:
- Apply a clear base coat.
- Leave a portion of your nails unpainted to create negative space.
- Paint a single thin line along the edge of each nail, framing the negative space.
- Seal with a clear top coat for a polished finish.
Dotted lines forming a whimsical pattern on a pastel base
To create a whimsical pattern with dotted lines on a pastel base:
- Apply a clear base coat.
- Paint your nails with a pastel color as the base.
- Use a thin nail art brush or dotting tool to create dotted lines in various patterns on each nail.
- Let the dots dry completely.
- Seal with a clear top coat for a glossy finish.
Alternating thick and thin lines for a textured and dimensional effect
To achieve a textured and dimensional effect with alternating thick and thin lines:
- Apply a clear base coat.
- Paint your nails with your desired base color.
- Use a thin nail art brush to paint thick lines on some nails and thin lines on others, alternating between them.
- Ensure the lines are evenly spaced and straight.
- Seal with a clear top coat for a glossy finish.
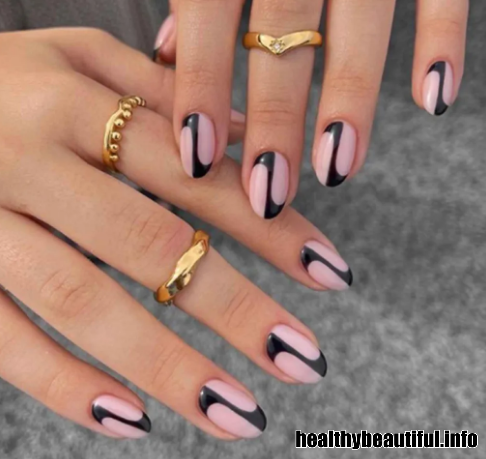
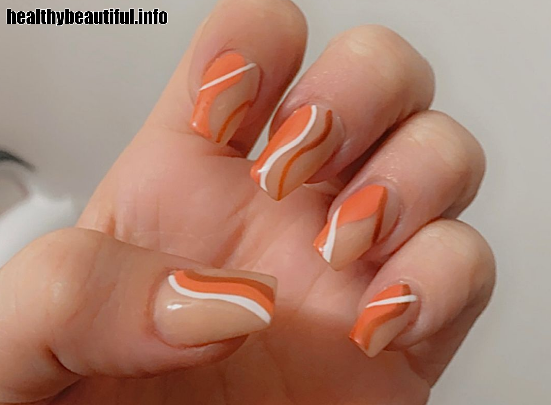
Abstract waves created with curved lines in complementary colors
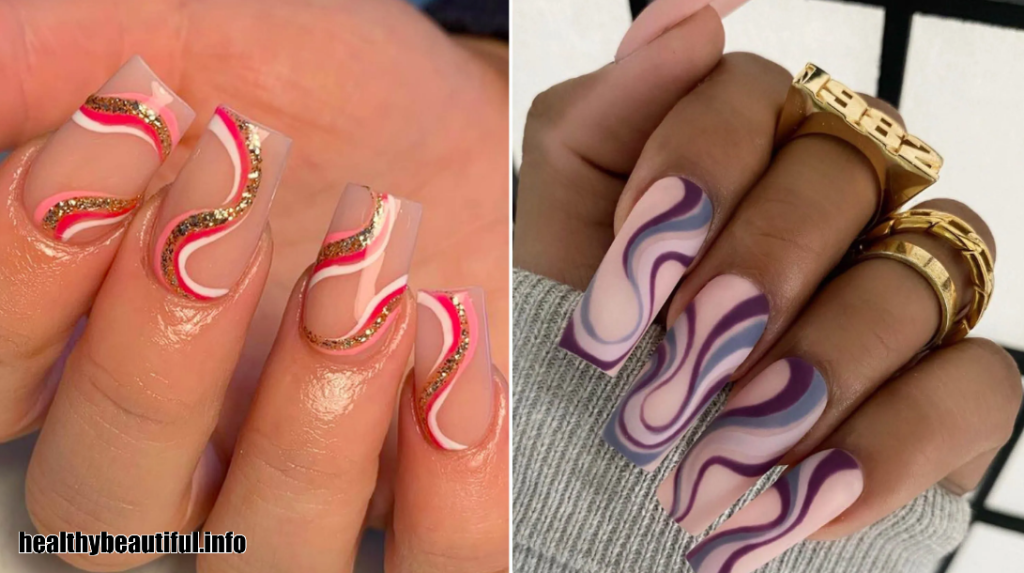
To create abstract waves with curved lines in complementary colors:
- Apply a clear base coat.
- Paint your nails with a neutral base color.
- Use thin nail art brushes to paint curved lines in complementary colors, creating abstract wave patterns on each nail.
- Ensure the lines flow smoothly and vary in thickness for added interest.
- Seal with a clear top coat for a glossy finish.
Negative space nails with a single line running along the center
To achieve negative space nails with a single line running along the center:
- Apply a clear base coat.
- Leave a portion of your nails unpainted to create negative space.
- Paint a single straight line along the center of each nail using a thin nail art brush or striping tape.
- Ensure the line is clean and precise.
- Seal with a clear top coat for a polished finish.
Linear design with intersecting lines forming a geometric grid

To craft a linear design with intersecting lines forming a geometric grid:
- Begin with a clear base coat.
- Paint your nails with a solid color as the base.
- Use a fine nail art brush or striping tape to create intersecting lines, forming a geometric grid pattern.
- Ensure clean and precise intersections for a polished look.
- Seal with a clear top coat to protect the design and add shine.
Negative space nails with a single line accentuating the natural nail shape
To achieve negative space nails with a single line accentuating the natural nail shape:
- Apply a clear base coat.
- Leave a portion of your nails unpainted to create negative space.
- Paint a single line along the natural curve of each nail, following its shape.
- Ensure the line is thin and precise.
- Seal with a clear top coat for a polished finish.
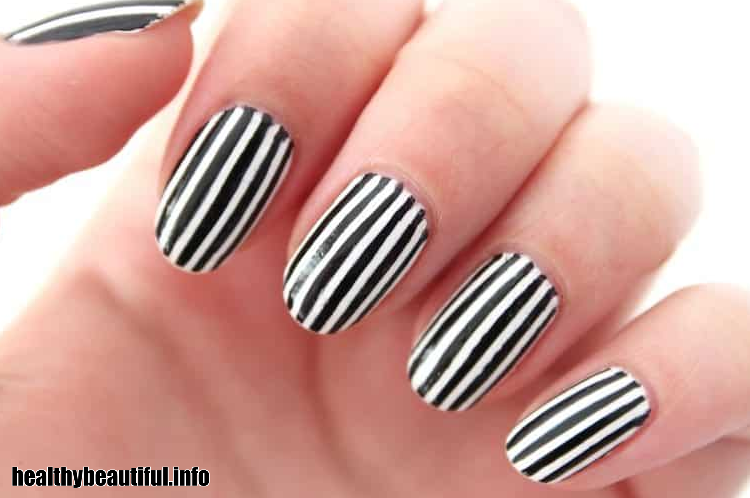
Thin, parallel lines in metallic silver on a glossy white base
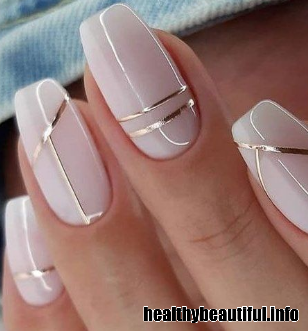
To create thin, parallel lines in metallic silver on a glossy white base:
- Apply a clear base coat to protect your nails.
- Paint your nails with a glossy white nail polish as the base color.
- Using a fine nail art brush or striping tape, carefully paint thin, parallel lines in metallic silver on each nail.
- Ensure the lines are evenly spaced and straight for a polished look.
- Allow the lines to dry completely.
- Seal your design with a clear top coat to add shine and protect the metallic lines.
Graphic linear design with bold black lines on a clear base
To achieve a graphic linear design with bold black lines on a clear base:
- Apply a clear base coat to protect your nails.
- Leave your nails transparent or apply a sheer clear polish as the base.
- Using a fine nail art brush or striping tape, create bold black lines in various patterns and shapes on each nail.
- Ensure the lines are clean and precise for a polished look.
- Allow the design to dry completely.
- Seal your design with a clear top coat to add shine and protect the lines.
Negative space nails with a single line framing the sides of each nail
To achieve negative space nails with a single line framing the sides of each nail:
- Apply a clear base coat to protect your nails.
- Leave the sides of each nail unpainted to create negative space.
- Paint a single thin line along the sides of each nail, framing the negative space.
- Ensure the lines are clean and precise.
- Seal your design with a clear top coat for a polished finish.
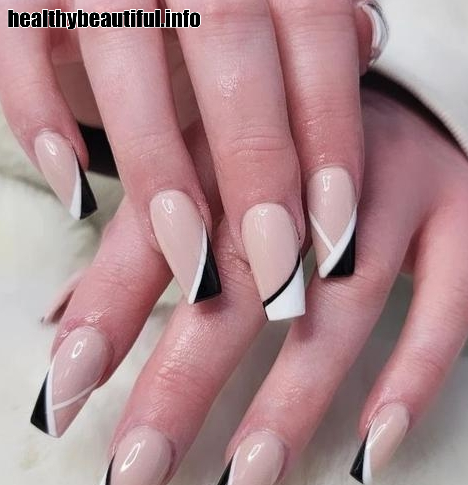
Linear design with asymmetrical lines for an edgy and avant-garde look
To create a linear design with asymmetrical lines for an edgy and avant-garde look:
- Apply a clear base coat to protect your nails.
- Paint your nails with a solid color base of your choice.
- Use a fine nail art brush or striping tape to create asymmetrical lines in various directions and lengths on each nail.
- Experiment with different thicknesses and angles for each line to achieve an edgy and dynamic effect.
- Allow the lines to dry completely.
- Seal your design with a clear top coat to add shine and protect the lines.
Negative space nails with a single line near the tip of each nail
To achieve negative space nails with a single line near the tip of each nail:
- Apply a clear base coat to protect your nails.
- Leave a portion near the tip of each nail unpainted to create negative space.
- Paint a single thin line near the tip of each nail, using a contrasting color.
- Ensure the lines are clean and precise.
- Seal your design with a clear top coat for a polished finish.
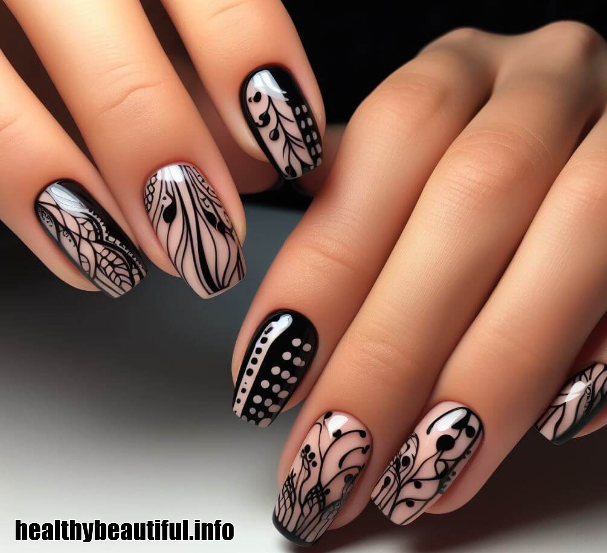
Thin lines forming a delicate lattice pattern on a sheer base
To create a delicate lattice pattern with thin lines on a sheer base:
- Apply a clear base coat to protect your nails.
- Paint your nails with a sheer or semi-transparent nail polish as the base.
- Use a fine nail art brush or striping tape to create thin lines in a lattice pattern on each nail.
- Ensure the lines are clean and precise, forming a delicate lattice.
- Allow the lines to dry completely.
- Seal your design with a clear top coat to add shine and protect the delicate pattern.
Linear design with diagonal lines crossing each other for a dynamic effect
To achieve a dynamic linear design with diagonal lines crossing each other:
- Apply a clear base coat to protect your nails.
- Paint your nails with a solid color base of your choice.
- Use a fine nail art brush or striping tape to create diagonal lines in various directions on each nail, allowing them to intersect.
- Ensure the lines are clean and precise, and vary the thickness for added dimension.
- Allow the lines to dry completely.
- Seal your design with a clear top coat to add shine and protect the lines.
Negative space nails with a single line dividing the nail diagonally
To achieve negative space nails with a single diagonal line dividing the nail:
- Apply a clear base coat to protect your nails.
- Leave a portion of each nail unpainted to create negative space.
- Paint a single diagonal line from one corner to the opposite corner of each nail, using a contrasting color.
- Ensure the line is clean and precise.
- Seal your design with a clear top coat for a polished finish.
Conclusion
In summary, minimalist nail art designs with lines offer endless possibilities for chic and sophisticated manicures. Explore classic French tips with modern twists or intricate geometric patterns. With 30 unique ideas to inspire you, now’s the perfect time to experiment and showcase your creativity. Join the conversation with fellow nail enthusiasts and let your nails become a canvas for self-expression.
FAQ
What are some popular minimalist nail art designs with lines?
Popular designs include classic French manicures with modern twists, negative space nails with single lines or geometric patterns, and abstract linear designs with intersecting lines.
How can I make my minimalist nail art designs unique?
Experiment with different color combinations, line thicknesses, and patterns to make your minimalist nail art designs stand out. You can also add subtle embellishments or textures for added interest.
Where can I find inspiration for minimalist nail art designs with lines?
Look for inspiration on social media platforms like Instagram, Pinterest, and nail art blogs. You can also create your own unique designs by combining different elements and techniques.
Can I mix and match different minimalist nail art designs?
Absolutely! Mix and match different designs to create your own unique look. You can combine classic French tips with abstract linear patterns or negative space nails with geometric accents for a truly personalized manicure.
How do I ensure my minimalist nail art designs with lines last longer?
To ensure longevity, apply a clear base coat before painting your designs and seal them with a clear top coat once they’re dry. Avoid exposing your nails to harsh chemicals or excessive moisture, and be gentle with your hands to prevent chipping.
Are minimalist nail art designs suitable for all nail lengths and shapes?
Yes, minimalist nail art designs with lines can be adapted to suit various nail lengths and shapes. Whether you have short or long nails, square or almond-shaped, you can create beautiful minimalist designs to complement your nails.
Can I use different nail polish finishes for minimalist designs?
Absolutely! You can experiment with different nail polish finishes such as matte, glossy, metallic, or sheer to add depth and dimension to your minimalist designs. Mixing and matching finishes can create visually interesting effects.
How can I incorporate negative space into my minimalist nail art designs?
Negative space nail art involves leaving certain areas of the nail unpainted to create visually striking designs. You can incorporate negative space into your minimalist designs by painting lines or patterns on bare nails or using transparent nail polish as a base.
Are there any tips for achieving clean and precise lines in minimalist nail art?
To achieve clean and precise lines, use thin nail art brushes or striping tape to paint your designs. Take your time and work slowly to ensure accuracy. If you make any mistakes, you can use a small brush dipped in nail polish remover to clean up the edges.
Can I create minimalist nail art designs with lines using gel nail polish?
Yes, you can create minimalist nail art designs with lines using gel nail polish. Gel polish offers long-lasting wear and durability, making it ideal for intricate designs. Follow the same steps for application and curing as you would with regular nail polish.